reno antenna tv guide

Reno Antenna TV Guide helps residents access local channels without cable․ It lists various HD and digital broadcasts, offering cost-effective entertainment and local news, perfect for viewers seeking free high-quality content․

What is the Reno Antenna TV Guide?

The Reno Antenna TV Guide is a comprehensive resource for viewers in Reno, Nevada, and surrounding areas to discover and access local over-the-air (OTA) television channels․ It provides detailed listings of available stations, including major networks like CBS, NBC, and FOX, as well as special interest and local channels․ The guide also highlights HD and digital broadcasts, ensuring users can enjoy high-quality programming without cable or satellite subscriptions․ By utilizing an antenna, residents can access a wide range of free content, including news, entertainment, and sports․ The guide is regularly updated to reflect channel lineups, programming schedules, and advancements in broadcast technology, such as NextGen TV․ It serves as an essential tool for anyone looking to maximize their OTA viewing experience in the Reno area․

Importance of the Guide

The Reno Antenna TV Guide is a vital resource for viewers seeking free, high-quality television content․ It enables residents to access local channels, including major networks and special interest stations, without the need for expensive cable or satellite subscriptions․ By providing detailed listings of available OTA channels, the guide helps users maximize their viewing experience․ It highlights HD and digital broadcasts, ensuring access to crystal-clear programming․ Additionally, the guide plays a crucial role in promoting cost savings, as it eliminates the need for paid services․ With its focus on local content, it connects viewers to regional news, sports, and community programming․ The guide also serves as a valuable tool for navigating the transition to NextGen TV and advanced broadcast technologies, making it an essential asset for modern viewers in Reno and surrounding areas․

Installation Tips

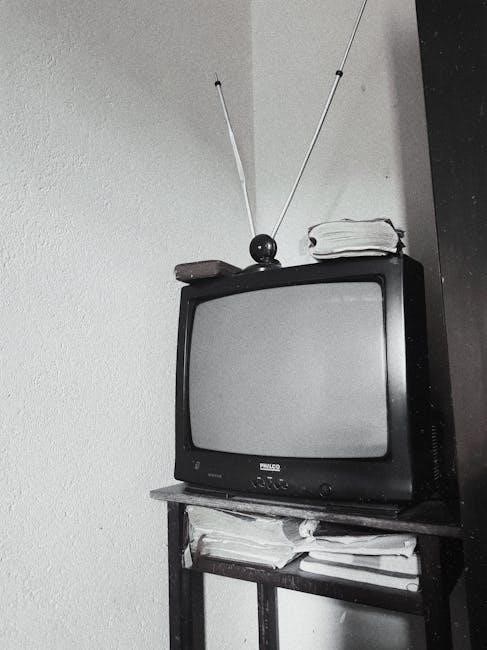
For optimal reception, choose the right antenna type and place it in a high, unobstructed area․ Test and adjust for best signal strength and clarity․

Choosing the Right Antenna

Selecting the right antenna is crucial for optimal TV reception in Reno; Consider indoor, outdoor, or attic-mounted options based on your location and signal strength․ Indoor antennas are ideal for strong signals, while outdoor antennas provide better range for weaker signals․ Ensure the antenna supports both VHF and UHF channels, as Reno stations broadcast on both frequencies․ Look for antennas with a high gain rating for better performance․ Motorized antennas can help adjust direction for clearer signals, while amplified antennas enhance weak signals․ Research and compare models to find one that suits your specific needs and location․ Proper antenna selection ensures access to all available channels, including HD and digital broadcasts, for a seamless viewing experience․

Optimal Placement

Proper placement of your antenna is key to receiving the best signal in Reno․ Position the antenna near a window or outdoors for stronger reception․ Aim it toward the broadcast towers, as signals are line-of-sight․ Higher placement, such as on a roof or attic, reduces interference from walls and furniture․ Use a signal meter or apps to find the strongest direction․ Avoid metal objects and electronic devices that can disrupt signals․ For indoor antennas, experiment with placement to maximize signal strength․ Test different locations and angles to ensure access to all available channels․ Proper placement ensures clear reception of HD and digital broadcasts, providing a seamless viewing experience for Reno residents․

Channel Listings

Reno Antenna TV Guide offers a diverse range of channels, including major networks like CBS, NBC, ABC, FOX, and MyNet, along with special interest and local stations, providing viewers with a variety of free, over-the-air entertainment options without the need for cable or satellite subscriptions․

Major Networks Available

Reno Antenna TV Guide provides access to major networks such as CBS, NBC, ABC, FOX, and MyNet․ These channels offer a wide variety of programming, including live sports, breaking news, popular TV shows, and movies․ With a simple antenna setup, viewers in Reno can enjoy high-quality, free broadcasts from these networks․ Channels like KTVN-DT1 (CBS) and K31FU-D (NBC) ensure residents stay informed and entertained with local and national content․ This service is a cost-effective alternative to cable, delivering reliable over-the-air signals for Reno’s diverse community․

Special Interest and Local Channels

Reno Antenna TV Guide also features a variety of special interest and local channels, offering diverse content for all audiences․ Channels like Antenna TV (KRXI-TV 11․3) and Rewind TV (KRXI 11;4) provide classic TV shows and retro programming․ Additionally, Dabl TV and Newsy bring lifestyle and news-focused content, respectively․ Local stations such as KNPB and KOLO-TV offer community-oriented programs, including local news, sports, and cultural events․ These channels cater to niche interests, ensuring viewers have access to unique programming that aligns with their preferences․ With a range of options, Reno residents can enjoy both entertainment and informative content tailored to their community, making the guide a valuable resource for those seeking more than just mainstream broadcasts․

HD and Digital Broadcasts

Reno Antenna TV Guide offers HD channels with clear digital signals․ NextGen TV provides enhanced features and significantly improved viewing experiences for local broadcasts․

Accessing HD Channels

To access HD channels in Reno, viewers can use a digital antenna to receive high-definition broadcasts․ Many local stations, such as CBS, NBC, and FOX affiliates, offer HD programming․ Additionally, sub-channels like Antenna TV and Rewind TV provide retro shows in clear digital quality․ NextGen TV technology enhances HD viewing with improved sound and visuals․ Residents can enjoy popular HD channels, including KTVN-DT1 and KRXI-TV, without needing cable or satellite․ The Reno Antenna TV Guide simplifies finding these channels by listing available HD broadcasts, ensuring viewers can easily tune in to their favorite shows with superior picture quality and no subscription fees․

NextGen TV Features

NextGen TV, also known as ATSC 3․0, offers advanced features for Reno viewers․ It provides 4K resolution, HDR, and immersive audio for enhanced viewing․ The technology integrates with internet connectivity, enabling interactive experiences like personalized content and emergency alerts․ Viewers in Reno can access NextGen TV through compatible devices, enjoying improved picture quality and sound․ Stations like KRXI-TV and others in Reno have adopted this technology, ensuring access to cutting-edge broadcasts․ NextGen TV also supports advanced advertising and data delivery, making it a future-ready platform․ With its innovative capabilities, NextGen TV revolutionizes over-the-air viewing in Reno, offering a modern alternative to traditional cable and satellite services․

Benefits and Conclusion

Using Reno Antenna TV Guide saves costs and offers local content․ It ensures access to free HD channels, enhancing viewing experiences while supporting future TV advancements in Reno․

Cost Savings and Local Content

Using an antenna in Reno provides significant cost savings by eliminating subscription fees for cable or satellite TV․ Viewers gain free access to major networks like CBS, NBC, and FOX, as well as local stations such as KRXI-TV and KTVN․ This setup allows residents to enjoy HD broadcasts without additional charges․ Local content is a major benefit, with channels offering news, weather, and community programs tailored to Reno and surrounding areas․ Special interest channels like Antenna TV and Rewind TV add variety to the lineup․ The ability to receive these signals for free makes it an attractive option for budget-conscious viewers․ Additionally, access to NextGen TV features ensures high-quality viewing experiences․ This combination of cost savings and diverse local content makes Reno Antenna TV Guide a valuable resource for the community․

The Reno Antenna TV Guide is a valuable tool for accessing free, high-quality television content․ With its focus on local channels and digital broadcasts, it provides viewers with cost-effective entertainment and news․ The future of antenna TV in Reno looks promising, with advancements like NextGen TV offering enhanced features such as 4K resolution and interactive capabilities․ As more stations adopt this technology, viewers can expect even better viewing experiences․ The guide will continue to play a crucial role in helping residents navigate the evolving landscape of over-the-air broadcasting․ By staying updated, the Reno Antenna TV Guide ensures users remain informed about new channels and technologies, making it an essential resource for years to come․

30 days to more powerful vocabulary pdf

Transform your vocabulary in just 30 days with this proven program. Designed by Norman Lewis and Wilfred Funk, now updated by Dan Strutzel, it offers a concise, 15-minute-a-day approach to building a powerful vocabulary. Through daily exercises and self-tests, you’ll enhance communication skills and intellectual capacity, making it ideal for students, professionals, and lifelong learners alike. Perfect for those seeking a structured, effective path to linguistic excellence without overwhelming time commitment.

Overview of the “30 Days to a More Powerful Vocabulary” Program

This structured guide is designed to help individuals enhance their vocabulary in just 30 days through a concise and manageable approach. The program, created by renowned experts Norman Lewis and Wilfred Funk, and updated by Dan Strutzel, focuses on delivering practical, daily exercises and self-tests. Each lesson requires only 15 minutes a day, making it accessible for busy individuals. The curriculum is tailored to build a strong foundation of word knowledge, with a focus on understanding and retention. By incorporating interactive self-tests and word lists, the program ensures steady progress and mastery. This updated version blends traditional methods with modern learning techniques, offering a comprehensive yet efficient path to improving linguistic skills.

Why Building a Strong Vocabulary is Essential in Today’s World

In today’s fast-paced, interconnected world, a robust vocabulary is a cornerstone of effective communication and intellectual growth. It enhances clarity in expression, deepens understanding, and fosters confident interactions. A strong vocabulary not only elevates professional opportunities but also enriches personal relationships and academic success. By expanding your word knowledge, you gain the ability to articulate ideas precisely, think critically, and engage meaningfully in diverse conversations. In a globalized society where communication is key, possessing a powerful vocabulary empowers individuals to navigate complex situations, express creativity, and convey ideas persuasively. It is a lifelong skill that opens doors to new perspectives and opportunities, making it an indispensable asset in both personal and professional spheres.

The Structure of the 30-Day Program

The program is divided into daily lessons, each requiring just 15 minutes. It includes targeted exercises, word lists, and self-tests to ensure steady vocabulary growth and retention.

How the 30-Day Plan Works: Daily Commitment and Progress Tracking

The 30-Day Vocabulary Challenge is designed for consistency and progress. Each day requires a manageable 15-minute commitment, focusing on learning and reinforcing new words. The program is structured to ensure steady growth, with daily exercises, word lists, and self-tests. Participants track their progress through quizzes and reflections, helping them stay motivated and measure improvement. The plan emphasizes repetition and practical application, ensuring words are retained long-term. By dedicating just 15 minutes daily, users can seamlessly integrate vocabulary building into their routine. This structured approach makes it accessible for everyone, from students to professionals, to enhance their linguistic skills effectively.

Key Features of the Program: Exercises, Self-Tests, and Word Lists

The program’s core features include daily exercises, self-tests, and curated word lists designed to maximize learning efficiency. Each lesson incorporates a variety of exercises, such as fill-in-the-blank sentences, word matching, and context-based learning, to engage users and reinforce retention. Self-tests at the end of each session help track progress and identify areas for improvement. The word lists are carefully selected to include high-impact vocabulary relevant to everyday communication and intellectual discourse. These features work together to create a comprehensive and interactive learning experience, ensuring users build a strong, functional vocabulary over 30 days. The structured approach ensures steady progress without overwhelming learners.

Authors and Creators Behind the Program

Norman Lewis and Wilfred Funk originally developed the program, with Dan Strutzel modernizing it. Their expertise in vocabulary development and education ensures a well-rounded, effective learning experience.

Norman Lewis and Wilfred Funk: Their Contribution to Vocabulary Development

Norman Lewis and Wilfred Funk are renowned for their groundbreaking work in vocabulary development. Their program, 30 Days to a More Powerful Vocabulary, has empowered millions to enhance their linguistic skills. Lewis, a linguistics expert, simplified complex concepts, while Funk, with his publishing and educational background, ensured the program’s accessibility. Their collaborative effort created a structured, 15-minute daily regimen featuring exercises, self-tests, and word lists. This approach has stood the test of time, making it a cornerstone for vocabulary improvement. Their work has been foundational for modern updates by experts like Dan Strutzel, ensuring their legacy endures in vocabulary education.

  • Creators of the original 30-day program.
  • Combined expertise in linguistics and education.
  • Structured, accessible approach for learners.

Dan Strutzel: The Modern Expert Behind the Updated Version

Dan Strutzel, a renowned personal development expert and English enthusiast, has revitalized the 30 Days to a More Powerful Vocabulary program for modern learners. Building on the foundation laid by Norman Lewis and Wilfred Funk, Strutzel has infused the program with contemporary teaching methods. His expertise in making complex concepts accessible has made the program a favorite among today’s students and professionals. Strutzel’s updated version maintains the original’s effectiveness while adding fresh insights, ensuring its relevance in today’s fast-paced world. His contribution has expanded the program’s reach, helping learners achieve linguistic excellence in just 30 days.

  • Modernized the program for today’s learners.
  • Combined traditional methods with innovative approaches.
  • Ensured the program’s enduring relevance and success.

Practical Insights and Benefits

Enhance your communication and intellectual capacity with a 15-minute daily commitment. This structured program ensures measurable progress, empowering you to express ideas with clarity and confidence in real-life situations.

  • Improves daily communication and professional interactions.
  • Boosts academic and career opportunities through better articulation.
  • Enhances intellectual capacity and self-confidence in conversations.

How 15 Minutes a Day Can Transform Your Vocabulary

Dedicating just 15 minutes a day to vocabulary building can yield remarkable results. This concise timeframe is designed to fit seamlessly into busy schedules, making it accessible to everyone. By focusing on targeted exercises, word lists, and self-tests, you can systematically expand your linguistic knowledge. Each day, you’ll engage with new words, their meanings, and usage examples, reinforcing retention through repetition and context. Over 30 days, this consistent effort leads to a significant improvement in communication skills, enabling you to articulate ideas more effectively and enhance your intellectual presence. The program’s structure ensures that even a short daily commitment can lead to long-term, transformative outcomes in your vocabulary and overall expression.

  • Concise daily exercises for efficient learning;
  • Focus on word meanings, contexts, and practical usage.
  • Track progress and reinforce retention through self-tests.

Real-Life Applications: Enhancing Communication and Intellectual Capacity

Enhancing your vocabulary through the 30-Day Challenge has profound real-world implications. A stronger vocabulary improves communication in professional and personal settings, enabling clearer expression of ideas and more effective persuasion. Intellectually, it deepens understanding across various subjects, from literature to science, and enhances problem-solving skills. Practical applications include excelling in academic pursuits, thriving in career environments, and engaging more meaningfully in conversations. The program equips you with the linguistic tools to articulate thoughts confidently and comprehend complex texts, fostering a more articulate and intellectually curious individual.

  • Improved clarity in professional and personal communication.
  • Enhanced academic and career opportunities.
  • Deeper understanding of diverse subjects and texts.
  • Increased confidence in articulating ideas and opinions.

Additional Resources and Tools

Supplement your 30-Day Vocabulary Challenge with the PDF guide, featuring word lists, exercises, and self-tests. Explore recommended readings and practical exercises for sustained vocabulary growth.

Supplementary Materials for Vocabulary Building

The 30 Days to a More Powerful Vocabulary PDF is complemented by a range of supplementary materials designed to enhance your learning journey. These include word lists, practice exercises, and self-tests to reinforce daily lessons. Additionally, users can access recommended readings and guides that expand on vocabulary development. The program also offers resources like monographs and handbooks for deeper exploration of specific topics. These materials are structured to support the 30-day plan, ensuring a well-rounded approach to building a robust vocabulary. They are ideal for those seeking to sustain progress beyond the initial program, providing tools for continuous improvement and linguistic growth.

Recommended Reading and Practice Exercises

To further enhance your vocabulary journey, the program recommends supplementary readings such as Word Power Made Easy and English Grammar Master in 30 Days. These resources provide additional insights and exercises to complement the daily lessons. Practice exercises include word lists, monographs, and monologues to reinforce learning. The program also suggests focusing on monosyllabic words and exploring topics like lingua franca to broaden cultural communication skills. These materials are designed to be practical, offering real-life applications that make vocabulary building both effective and engaging. By incorporating these resources, learners can sustain progress and achieve a superior command of English vocabulary. Regular practice ensures lasting results beyond the 30-day challenge.

Complete the 30-day challenge and unlock a transformative vocabulary. With consistent effort, you’ll achieve enhanced communication skills and intellectual growth, empowering you for lifelong success.

Final Tips for Sustaining Vocabulary Growth Beyond 30 Days

To maintain and expand your vocabulary beyond the 30-day challenge, incorporate learning into your daily routine. Dedicate 10-15 minutes to review and practice new words using flashcards or apps. Engage in conversations where you can naturally use the words you’ve learned. Reading books, articles, and newspapers exposes you to new contexts, reinforcing retention. Additionally, explore supplementary resources like Word Power Made Easy or vocabulary-building podcasts for continued growth. Stay curious and committed—consistent practice ensures long-term success and intellectual enrichment.

Posted in PDF

tv guide st peters mo

Overview of the TV Guide for St․ Peters, MO

Discover the comprehensive TV guide for St․ Peters, MO, offering detailed listings of local channels, network shows, and specialty programming for cable, satellite, and over-the-air viewers․

TV listings in St․ Peters, MO, provide residents with a detailed schedule of programs airing on local channels․ These listings cover cable, satellite, and over-the-air broadcasts, ensuring viewers can plan their entertainment․ From major network channels to specialty stations, the guide offers a diverse range of options․ Local stations like KSDK and its subchannels (5․1, 5․2) feature news, sports, and entertainment․ The listings also highlight popular shows, movies, and live events, making it easy for viewers to stay informed and entertained․

1․2 Importance of TV Guides for Local Viewers

TV guides are essential for local viewers in St․ Peters, MO, as they provide a convenient way to plan viewing schedules․ They help residents discover new shows, movies, and live events while staying updated on local programming․ With detailed listings, viewers can easily find their favorite channels and genres, enhancing their entertainment experience․ Additionally, TV guides serve as a valuable resource for staying informed about local news, sports, and community events, making them indispensable for both casual and dedicated viewers․

Accessing the TV Guide for St․ Peters, MO

Residents can access the TV guide for St․ Peters, MO, through cable providers, satellite services, or online platforms․ Check listings via Spectrum, DirecTV, or Dish Network for schedules․

2․1 Cable TV Listings

Cable TV listings in St․ Peters, MO, provide a wide range of channels, including major networks like ABC, CBS, and FOX, as well as specialty channels for sports, movies, and more․ Popular cable providers such as Spectrum and Xfinity offer detailed schedules for local and national programming․ Viewers can access these listings through their provider’s website or mobile app․ Additionally, channels like KSDK (NBC) and KPLR (CW) are prominent in the area, offering both entertainment and local news․ Cable listings ensure a seamless viewing experience for residents․

2․2 Satellite TV Listings

Satellite TV listings in St․ Peters, MO, provide extensive channel options through providers like DIRECTV and DISH Network․ These services offer access to popular networks such as FOX, NBC, and CBS, along with specialty channels for sports and movies․ Satellite listings are ideal for viewers seeking a broader range of programming, including HD channels and exclusive content․ Check your provider’s schedule for live events, primetime shows, and local broadcasts tailored to the St․ Peters area for a personalized viewing experience․

2․3 Over-the-Air TV Listings

Over-the-air TV listings in St․ Peters, MO, offer free access to local channels using an antenna․ Major networks like ABC, CBS, FOX, and NBC are available, along with PBS and independent stations․ Viewers can enjoy local news, sports, and classic shows without subscription fees․ Additional stations may include niche programming, such as retro TV or religious content․ Over-the-air listings provide a cost-effective way to stay connected to local broadcasts and entertainment in HD quality, making it a popular choice for budget-conscious viewers in the area․

Popular Channels in St․ Peters, MO

Popular channels include major networks like ABC, CBS, FOX, and NBC, along with local stations such as KSDK and KPLR, offering diverse programming for all viewers․

3․1 Major Network Channels

Major network channels in St․ Peters, MO, include ABC, CBS, FOX, and NBC, providing a wide range of programming such as news, primetime shows, and live sports․ These networks are widely available through cable, satellite, and over-the-air antennas, ensuring access for all viewers․ Popular shows like The Big Bang Theory and 48 Hours are featured, catering to diverse audience interests and preferences․ Local affiliates like KSDK and KPLR also offer regional news and community-focused content․

3․2 Local Stations and Their Programming

Local stations in St․ Peters, MO, such as SPTV, offer unique programming tailored to community interests․ These stations broadcast city council meetings, local sports, and educational content․ Popular shows include The Big Bang Theory and 48 Hours, while specialty channels like the True Crime Network and Quest TV provide diverse entertainment․ These stations cater to residents’ preferences, ensuring a mix of informative and engaging content that reflects the community’s needs and interests․

3․3 Specialty Channels Available

In St․ Peters, MO, viewers can access a variety of specialty channels offering niche content․ Channels like Get, True Crime Network, Quest TV, and Nosey provide unique programming tailored to specific interests․ These channels feature documentaries, crime dramas, and reality TV shows, catering to diverse viewer preferences․ With options for both entertainment and educational content, specialty channels enhance the viewing experience for residents in St․ Peters, ensuring there’s something for everyone to enjoy․

Popular TV Shows in St․ Peters, MO

St․ Peters, MO, viewers enjoy shows like The Big Bang Theory and 48 Hours on KPLR HDTV 11․1 and KPLR Court TV 11․2, with diverse programming for primetime and daytime audiences․

4․1 Primetime TV Shows

Primetime TV in St․ Peters, MO, features popular shows like The Big Bang Theory and 48 Hours, airing on channels such as KPLR HDTV 11․1 and KPLR Court TV 11․2․ These programs attract a wide audience with their engaging content, from comedy to crime dramas․ Viewers can also explore other primetime favorites, ensuring there’s something for everyone during peak evening hours․ The diverse lineup caters to various interests, making primetime a highlight for local entertainment in St․ Peters․

4․2 Daytime TV Programming

Daytime TV in St․ Peters, MO, offers a mix of engaging shows tailored for various audiences․ Talk shows, lifestyle programs, and educational content dominate the schedule․ Channels like KSDK feature diverse daytime lineups, including news, health segments, and entertainment․ Viewers can enjoy popular series or informative programs designed to fit morning and afternoon routines․ This variety ensures there’s something for everyone, making daytime TV a staple for local entertainment in St․ Peters, Missouri․

4․3 Weekend Specials and Movies

Weekends in St․ Peters, MO, bring exciting specials and a wide range of movies for all tastes․ From blockbuster premieres to classic films, local channels and cable providers offer diverse movie listings․ Viewers can enjoy themed movie nights, family-friendly films, or sports specials․ Check the TV guide for detailed schedules, ensuring you don’t miss out on weekend entertainment tailored for relaxation and enjoyment in St․ Peters, Missouri․

Sports and Movie Listings in St․ Peters, MO

Stay updated on live sports events and movie schedules in St․ Peters, MO․ From local games to blockbuster films, the TV guide offers comprehensive listings for sports fans and movie enthusiasts alike․

5․1 Live Sports Events

Catch live sports events in St․ Peters, MO, with detailed TV listings․ From local high school games to professional leagues, viewers can track schedules for football, basketball, baseball, and more․ Major networks like ESPN, FOX Sports, and NBC Sports provide extensive coverage․ Stay updated on real-time scores and game highlights․ The TV guide ensures you never miss a moment of your favorite sports action, whether it’s national events or regional matchups․

5․2 Movie Listings and Schedules

Explore a wide range of movie listings and schedules in St․ Peters, MO․ From classic films to the latest releases, viewers can enjoy movies on popular networks like TBS, TNT, and AMC․ Check out cable and satellite listings for Hollywood blockbusters, indie films, and family-friendly options․ Over-the-air channels also offer a selection of free movies․ Stay updated on showtimes and plan your movie nights with ease using the detailed TV guide for St․ Peters, ensuring you never miss your favorite films․

How to Find and Customize Your TV Guide

Easily access and personalize your TV guide for St․ Peters, MO, by selecting your provider and filtering listings by channels, genres, or favorite shows to enhance your viewing experience․

6․1 Steps to Find the TV Guide

To find the TV guide for St․ Peters, MO, visit your provider’s website or mobile app․ Spectrum, DirecTV, and Dish Network offer detailed listings․ Filter by channel, genre, or time to customize your view․ Check local stations like KSDK or KPLR for broadcast schedules․ Use the guide to plan your day or week, ensuring you never miss your favorite shows or live events․ Easily search for movies, sports, or primetime programming tailored to your interests and viewing preferences in St․ Peters, MO․

6․2 Customizing Your Viewing Experience

Enhance your TV experience by customizing your guide․ Filter listings by genre, such as sports or movies, and save favorite channels for quick access․ Set reminders for upcoming shows and create a personalized watchlist․ Adjust the time zone settings to ensure accurate scheduling․ Many providers also offer mobile apps, enabling you to plan your viewing on the go․ Tailor your preferences to suit your interests, ensuring you never miss your favorite programs or live events in St․ Peters, MO․

spice rack plans pdf

Discover how to create a stylish and functional spice rack with easy-to-follow PDF plans. These designs offer customizable solutions to organize your spices, ensuring they are always within reach. Perfect for DIY enthusiasts, these plans provide step-by-step guidance for a seamless woodworking experience.

Importance of Spice Rack Plans

Spice rack plans are essential for creating organized and functional kitchen spaces. By using these plans, you can maximize storage while keeping your spices easily accessible, which is crucial for efficient cooking. A well-designed spice rack helps maintain a clutter-free kitchen, ensuring your spices are protected from light and moisture, which can degrade their quality. Additionally, these plans allow for customization, catering to different kitchen layouts and spice collections. Whether you prefer wall-mounted or standalone units, having a clear plan ensures your project is both aesthetically pleasing and practical. DIY enthusiasts benefit from step-by-step instructions, making it easier to achieve professional-grade results. Furthermore, spice rack plans promote sustainability by repurposing materials and minimizing waste. With the right plan, you can enhance your cooking experience while adding a personalized touch to your kitchen decor. This makes spice rack plans a valuable resource for homeowners seeking to elevate their kitchen organization and functionality.

Types of Spice Racks

Spice racks come in various forms, including wall-mounted designs for space-saving and standalone units for flexibility. These options cater to different kitchen layouts, ensuring spices are neatly organized and easily accessible. Choose the type that best suits your storage needs and style preferences.

Wall-Mounted Spice Rack Designs

Wall-mounted spice racks are a popular choice for their space-saving efficiency. These designs are ideal for kitchens with limited counter space, allowing you to maximize your walls. Many PDF plans feature adjustable shelves and customizable layouts to fit various spice bottle sizes. Some designs are specifically crafted for the inside of pantry doors, offering a convenient and hidden storage solution. Others can be mounted directly on any wall, providing easy access while cooking. The plans often include detailed measurements and cutting lists, ensuring a precise fit for your space. With options ranging from modern to rustic styles, you can choose a design that complements your kitchen decor. Additionally, wall-mounted racks keep your spices organized and prevent clutter, making them a practical addition to any home. Whether you prefer a simple, minimalist look or a more elaborate design, there’s a wall-mounted spice rack plan available to suit your needs and skill level.

Standalone Spice Rack Units

Standalone spice rack units offer a versatile and self-contained solution for organizing your spices. These designs are perfect for countertops or kitchen islands, providing easy access without the need for wall installation. Many PDF plans feature compact footprints, making them ideal for small kitchens or spaces with limited storage. Standalone racks often include multiple tiers or compartments, allowing for efficient use of space while keeping spices visible and within reach. Some designs are specifically tailored to fit standard spice bottle sizes, ensuring a neat and orderly arrangement. Additionally, these units can be crafted from a variety of materials, such as wood or metal, to match your kitchen decor. Portability is another advantage, as standalone racks can be easily moved or rearranged as needed. With detailed instructions and cutting lists provided in the plans, DIY enthusiasts can create a functional and stylish spice storage solution. Whether you prefer a modern, minimalist aesthetic or a rustic charm, standalone spice rack units offer a practical and customizable way to keep your spices organized and accessible.

Materials and Tools Required

To build a spice rack, you’ll need materials like wood, metal, or glass, depending on the design. Essential tools include a saw, drill, sandpaper, and screwdriver. Detailed cutting lists and measurements are provided in most PDF plans for accuracy.

Common Materials for Construction

Wood is the most popular material for building spice racks, offering durability and a natural aesthetic. Common types include pine, oak, and maple, each providing unique grain patterns and finishes. Metal, such as aluminum or stainless steel, is also used for modern designs, offering sleek, rust-resistant options. Glass can be incorporated for transparent shelves, adding a contemporary touch. Plastic and composite materials are alternatives for budget-friendly projects. Reclaimed wood is a sustainable choice, ideal for eco-conscious builders. Most PDF plans specify the exact materials needed, ensuring compatibility with the design. When selecting materials, consider the intended use, style, and budget to create a functional and visually appealing spice rack.

Essential Tools Needed

Building a spice rack requires a set of basic tools to ensure precision and quality. A circular saw or handheld saw is necessary for cutting wood to the required measurements. Sandpaper is essential for smoothing out rough edges and surfaces, ensuring a polished finish. A drill is needed for creating holes for screws or dowels, while a screwdriver or screw gun helps secure the pieces together. Measuring tapes and squares are crucial for accurate cuts and alignments. Clamps are useful for holding the pieces in place while gluing or fastening. A pencil and marker are handy for marking cut lines and holes. Safety equipment, such as gloves and goggles, is important to protect yourself during the process. For more intricate designs, power tools like a router or jigsaw may be necessary. A workbench provides a stable surface for assembly. Most PDF plans list the specific tools required, making it easy to prepare before starting your project. Having these tools on hand ensures a smooth and efficient building experience.

Design Considerations

When designing a spice rack, consider the space available, the size of your spice containers, and the style of your kitchen. Measure your area carefully to ensure a perfect fit. Choose designs that complement your kitchen’s aesthetic, whether modern or traditional. Functionality is key, so prioritize easy access and visibility. Consider adjustable shelves or compartments for versatility. Some plans include features like door mounts or rotating elements for added convenience. Ensure the design aligns with your cooking habits and spice collection size. Adaptability to future changes, like adding more spices, is also worth considering. A well-thought-out design ensures your spice rack is both practical and visually appealing.

Measuring Your Space

Accurate measurements are crucial for a well-fitted spice rack. Start by assessing the dimensions of your available space, whether it’s on a wall, inside a cabinet, or on a countertop. Consider the height, width, and depth to ensure your spice rack fits seamlessly. For wall-mounted designs, measure the area carefully to avoid obstructions like light switches or outlets. If building a standalone unit, ensure it aligns with your kitchen’s workflow. Don’t forget to account for the size of your spice bottles, as this will influence the rack’s shelf spacing and overall proportions. Use a tape measure to record precise dimensions, and refer to your PDF plans to match the design specifications. Proper measurement ensures your spice rack is both functional and visually appealing. Incorrect sizing can lead to a poor fit or reduced usability, so double-check your numbers before cutting materials. By carefully measuring your space, you’ll create a spice rack that enhances your kitchen’s organization and aesthetic. This step is foundational to a successful project, so take your time to get it right.

Aesthetic Matching

Aesthetic matching is essential to ensure your spice rack complements your kitchen decor. Choose materials and designs that align with your kitchen’s style, whether modern, rustic, or minimalist. For instance, a wooden spice rack with a natural finish can blend seamlessly with traditional or country-themed kitchens, while a sleek metal or glass design suits contemporary spaces. Consider the color palette of your kitchen and select finishes like white, oak, or stainless steel to create a cohesive look. Additionally, think about the shape and size of the rack—slim designs for small spaces or larger units for ample storage; Many PDF plans offer customizable options, allowing you to tailor the rack to your aesthetic preferences. Pay attention to details like hardware, such as knobs or handles, to enhance the overall appearance. By matching your spice rack’s style to your kitchen, you create a harmonious and visually appealing environment. This step ensures your project is both functional and beautiful, elevating your kitchen’s design. A well-designed spice rack can become a decorative element, showcasing your personal style while keeping spices organized.

Locating the Best PDF Plans

Finding the right PDF plans for your spice rack is crucial for a successful project. Websites like Making Manzanita and Construct101 offer high-quality, downloadable plans designed for DIY enthusiasts. These plans often include detailed instructions, measurements, and visual cut lists to guide you through the process. Many PDFs are free, while others may require a small fee for premium designs. Look for plans that match your skill level and the specific style you want, such as wall-mounted or standalone units. Some plans cater to specific spice bottle sizes, ensuring a perfect fit. Additionally, check for customizable options, as many PDFs offer both imperial and metric measurements. Shopping lists and 3D images are also common features, making the project easier to visualize and execute. By choosing a well-structured PDF plan, you can ensure your spice rack turns out functional and stylish, enhancing your kitchen’s organization and aesthetic appeal. These resources are perfect for beginners and experienced woodworkers alike, providing clear guidance for a polished finish.

Posted in PDF

use guide perhaps crossword clue

The crossword clue “Use guide, perhaps” hints at a word or phrase combining “use” and “guide,” suggesting a tool or method for navigation or instruction, commonly seen in puzzles as “user guide.”

Overview of the Crossword Clue

The crossword clue “Use guide, perhaps” is a common riddle in many puzzles, requiring solvers to think creatively about word combinations. It often suggests a phrase or term that merges “use” and “guide” in a clever way. For example, “user guide” is a frequent solution, as it directly combines the two words. However, the clue’s ambiguity allows for multiple interpretations, making it both challenging and engaging. The structure of the clue hints at a compound word or phrase, encouraging solvers to explore different meanings of “use” and “guide.” This type of clue is popular in both standard and cryptic crosswords, as it tests linguistic agility and problem-solving skills. Understanding the clue’s wordplay is key to unlocking its solution, making it a great exercise for improving crossword techniques.

Importance of Understanding the Clue

Mastering the “Use guide, perhaps” crossword clue is essential for improving puzzle-solving skills and expanding vocabulary. This clue often appears in various crossword formats, making it a valuable challenge to conquer. Understanding its structure and possible interpretations enhances analytical thinking and wordplay recognition. The clue’s ambiguity trains solvers to think creatively, connecting seemingly unrelated words like “use” and “guide.” This skill is transferable to other crossword puzzles, aiding in deciphering similar cryptic or straightforward clues. Additionally, solving such riddles boosts confidence and sharpens linguistic agility, making it a rewarding exercise for both casual and experienced puzzlers. Grasping this clue’s nuances is a step toward becoming a more proficient crossword enthusiast.

Defining “Use Guide” in Crosswords

“Use guide” in crosswords often refers to a user guide or manual, combining “use” and “guide” to form a term related to instructional tools or methods.

Possible Meanings of “Use”

The term “use” in crosswords can have multiple interpretations. It may refer to employing something for a purpose, like using a tool or method. Additionally, “use” can imply application or utilization, such as using a guide to navigate. In some clues, “use” might suggest a homophone or wordplay, like “user” or “usher.” It can also hint at common phrases or compound words, such as “user guide” or “misuse.” The versatility of “use” allows it to fit various crossword contexts, making it a dynamic clue component. Understanding its multiple meanings is key to solving related puzzles effectively.

Interpreting “Guide” in Crossword Contexts

In crosswords, “guide” often refers to a person or tool providing direction, such as a mentor or manual. It can also imply leading or directing, like “usher” or “pilot.” Sometimes, “guide” is used metaphorically, suggesting influence or control. In cryptic clues, it might hint at wordplay, like combining “guide” with other words to form phrases. For example, “use guide” could morph into “user guide” or “usher.” The word’s flexibility makes it a popular clue element, offering both literal and abstract interpretations. Recognizing these nuances helps solvers decode crossword puzzles more efficiently and enjoy the challenge of wordplay.

Exploring Possible Answers

Exploring possible answers, the crossword clue could point to “user guide” or “usher,” both fitting the context and common solutions.

Common Solutions for “Use Guide, Perhaps”

One of the most common solutions for the crossword clue “Use guide, perhaps” is “user guide,” a straightforward combination of the words that fits well in many puzzles. Another frequently seen answer is “usher,” which can imply guiding or directing someone, aligning with the clue’s intent. These solutions are popular due to their relevance and common usage in crosswords. They effectively bridge the gap between the literal meaning of “use” and the contextual interpretation of “guide,” making them ideal fits for this type of clue.

Less Common but Relevant Answers

While “user guide” and “usher” are the most frequent answers, less common solutions exist. One such answer is “usher,” which can imply guiding someone, fitting the clue’s intent. Another option is “manual,” referring to a guide for using something. “Guidebook” is another possibility, though it’s less likely due to its length. These answers show the clue’s versatility, allowing for creative interpretations beyond the obvious. They demonstrate how crosswords often challenge solvers to think outside the box, considering both literal and metaphorical meanings. These less common answers add depth to the puzzle, making it more engaging for experienced solvers.

Understanding Crossword Clue Structure

Crossword clues like “Use guide, perhaps” often blend definition and wordplay. They may suggest direct meanings, like “user guide,” or hint at homonyms such as “usher,” adding layers of complexity to the puzzle. The structure typically includes a definition part and a wordplay part, encouraging solvers to think creatively. The word length and type of crossword, such as cryptic or standard, also influence the approach to solving the clue. This combination of literal and figurative elements makes crossword clues both challenging and engaging for solvers of all levels.

How Cryptic Clues Work

Cryptic crossword clues are cleverly constructed, using wordplay and indirect hints to lead solvers to the answer. They typically combine definition and wordplay, often involving puns, anagrams, double meanings, or homophones. The clue “Use guide, perhaps” is a classic example, where “use” might suggest employing something, while “guide” could hint at directing or leading. In cryptic clues, the wordplay often involves splitting the clue into two parts: one indicating the definition and the other the method of constructing the answer. The solver must decipher these hints to uncover the correct word or phrase. This layer of complexity makes cryptic crosswords both challenging and rewarding, requiring a blend of linguistic knowledge and creative thinking. The art lies in unraveling the subtle connections between the words.

Tips for Solving Similar Clues

When tackling cryptic clues like “Use guide, perhaps,” focus on identifying wordplay and double meanings. Consider synonyms, anagrams, and homophones. Break down the clue into its components: “use” might suggest employing something, while “guide” could imply direction or instruction. Look for common phrases that combine these concepts, such as “user guide,” which fits naturally. Pay attention to how words can serve multiple roles in a clue, and don’t hesitate to think creatively. Practice recognizing patterns and familiarize yourself with common crossword terminology to enhance your solving skills. Patience and persistence are key to mastering these clever puzzles.

The crossword clue “Use guide, perhaps” is best solved by considering wordplay and common terms. The most fitting answer is “user guide,” a widely recognized term that combines both words neatly, aligning with crossword structure and common usage.

Final Thoughts on the Clue

The crossword clue “Use guide, perhaps” is a clever example of wordplay, challenging solvers to think creatively about combining words. The most likely answer, “user guide,” blends “use” and “guide” seamlessly, reflecting common crossword strategies. This clue highlights the importance of understanding both literal and figurative meanings in crossword puzzles. By breaking down the clue into its components and considering possible interpretations, solvers can unlock even the most cryptic clues. Practice and familiarity with crossword conventions will undoubtedly improve your ability to tackle similar puzzles with confidence.

Encouragement for Further Practice

Embrace the challenge of crossword puzzles as a rewarding mental exercise. Solving clues like “Use guide, perhaps” sharpens your vocabulary, critical thinking, and problem-solving skills. Each puzzle offers a chance to discover clever wordplay and expand your knowledge. Don’t hesitate to use tools like crossword solvers or dictionaries to aid your learning. Consistent practice will enhance your ability to decode cryptic clues and recognize patterns. Celebrate small victories and enjoy the journey of improving your crossword-solving prowess. Keep practicing, and soon you’ll master even the most complex clues with ease and confidence!

first alert co detector manual

Welcome to the First Alert CO Detector Manual. This guide provides essential information for safe installation, operation, and maintenance of your carbon monoxide detector.

Reading this manual carefully ensures proper usage and maximizes safety. Understand the detector’s features, installation steps, and troubleshooting tips to protect your home and family effectively.

1.1 Overview of the First Alert CO Detector

The First Alert CO Detector is a state-of-the-art device designed to detect dangerous levels of carbon monoxide in your home. It provides early warning systems, ensuring your safety and peace of mind. With advanced features like battery backup and LED indicators, this detector is reliable and user-friendly. It is specifically engineered to alert you to the presence of CO, a colorless, odorless, and deadly gas. The detector is easy to install and maintain, making it an essential addition to any home safety system.

1.2 Importance of the Manual for Safe Installation and Use

This manual is crucial for ensuring the safe and proper installation of your First Alert CO Detector. It provides detailed instructions to maximize the device’s effectiveness and prevent false alarms. Following the guidelines helps you understand the detector’s features, such as battery maintenance and LED indicators. Proper installation and usage are vital to safeguard against carbon monoxide risks. By adhering to the manual, you can ensure your detector functions correctly, protecting your home and loved ones from potential dangers.

Understanding the Components of the First Alert CO Detector

The First Alert CO Detector includes a sensor, alarm, mounting bracket, and battery. These components work together to detect and alert you to dangerous CO levels.

2.1 Key Features of the Detector

The First Alert CO Detector boasts advanced features for reliable carbon monoxide detection. It includes a battery backup for continuous monitoring during power outages and a loud, piercing alarm to ensure alerts are heard clearly. The detector also features an LED indicator that flashes to signal the presence of CO, providing visual confirmation of potential danger. Additionally, it includes a test/silence button for easy testing and silencing of false alarms, ensuring peace of mind and efficient operation. These features enhance safety and user convenience, making it a trusted choice for home protection.

2.2 Components Included in the Package

The First Alert CO Detector package includes the detector unit itself, a mounting bracket, and necessary hardware for installation. Additionally, a detailed user manual is provided, offering step-by-step installation and operating instructions. Some models may also include a battery for initial setup. Ensure all components are accounted for before proceeding with installation to guarantee proper functioning and safety. These components are designed to make setup straightforward and ensure the detector operates effectively in detecting carbon monoxide threats.

Installation Guidelines for the First Alert CO Detector

Proper installation is crucial for the First Alert CO Detector. Choose the right location, follow the steps carefully, and test the alarm to ensure functionality and safety.

3.1 Choosing the Right Location for the Detector

Proper placement of the First Alert CO Detector is critical for accurate detection. Install detectors on every level of your home and near sleeping areas to ensure early warning.

Place detectors at least 5 feet away from fuel-burning appliances like furnaces or water heaters to avoid false alarms.

Mount the detector high on walls or on ceilings, as carbon monoxide rises. Avoid areas near windows, doors, or vents where drafts could interfere.

Install detectors in basements, garages, and near attached garages, as these areas are common sources of carbon monoxide.

3.2 Step-by-Step Installation Process

Turn off all power sources before starting the installation.

Mount the detector bracket on the wall or ceiling using screws.

Place the detector unit onto the bracket and tighten it firmly.

Restore power and test the detector by pressing the Test/Silence button.

Ensure the alarm sounds to confirm proper installation and functionality.

3.3 Mounting the Detector Bracket

Locate the optimal spot for the detector, ensuring compliance with safety guidelines.

Use the provided screws to secure the bracket to the wall or ceiling.

Ensure the surface is level and sturdy to support the detector.

Tighten the bracket firmly to prevent any movement or loosening over time.

Double-check the installation to confirm it is stable and correctly positioned.

Operating the First Alert CO Detector

Understand the LED indicators and Test/Silence button for seamless operation. Regular testing ensures functionality, while proper usage guarantees early warnings for safety. Follow manual guidelines for optimal performance.

4.1 Basic Functions and Controls

The First Alert CO Detector features a Test/Silence button for quick functionality checks and silencing false alarms. LED indicators provide visual alerts, with flashing patterns indicating CO detection or errors. A battery compartment ensures easy replacement, while the unit’s compact design allows seamless integration into any home environment. The detector operates silently under normal conditions, ensuring uninterrupted daily life. Familiarize yourself with these controls to ensure proper operation and maintain a safe living space. Regular checks and tests are crucial for optimal performance and reliability. Follow manual instructions for best results.

4.2 Testing and Silencing the Alarm

Press the Test/Silence button to check the detector’s functionality. A loud beep confirms it’s working. This button also silences false alarms. After silencing, the alarm will sound again if CO levels remain high; Always ensure the detector is functioning correctly. Regular testing is crucial for safety. Never ignore the alarm, as it indicates potential danger. Follow manual instructions for proper testing and silencing procedures. Ensuring the alarm is in good working condition is vital for protecting your home and family from carbon monoxide threats. Stay vigilant and proactive with your safety measures.

4.3 Understanding the LED Indicators

The LED indicators on your First Alert CO detector provide visual alerts and status updates. A steady red light indicates a CO alarm, while a flashing red light signals a high level of CO. A green light shows the unit is powered and functioning correctly. If the LED is off, check the battery or power connection. These indicators ensure you stay informed about the detector’s status and any potential dangers. Always monitor the LED lights to maintain safety and respond promptly to alerts.

Maintenance and Troubleshooting

Regular maintenance ensures optimal performance and safety. Clean the detector, replace batteries, and address issues promptly. Troubleshooting common problems helps prevent false alarms and potential dangers.

5.1 Cleaning and Maintaining the Detector

Regular cleaning is crucial for optimal performance. Use a soft brush or vacuum to remove dust from the detector’s exterior and vents. Avoid using chemicals or liquids, as they may damage the sensor. Check the battery compartment for corrosion and ensure it is clean. Replace batteries annually or as indicated by the manufacturer. Inspect the detector for any physical damage and test it monthly. Proper maintenance ensures reliable operation and accurate detection of carbon monoxide levels, safeguarding your home and family.

5.2 Replacing the Battery

To ensure your First Alert CO detector functions properly, replace the battery annually or when the low-battery warning sounds. Open the battery compartment located on the back or bottom of the unit. Remove the old battery and insert a new one of the recommended type, ensuring correct orientation. Close the compartment securely. Test the detector by pressing the Test/Silence button to confirm it’s working. Never ignore the low-battery alert, as it compromises your safety. Proper battery replacement ensures continuous monitoring and reliable alerts for carbon monoxide detection.

5.3 Troubleshooting Common Issues

If your First Alert CO detector malfunctioning, check for common issues. Ensure the battery is installed correctly and not expired. If the alarm sounds without CO presence, it may be a false alarm caused by dust or cooking fumes. Clean the sensor with a soft brush or vacuum. If the LED indicator flashes erratically, reset the detector by pressing and holding the Test/Silence button. For persistent problems, consult the manual or contact First Alert customer support. Regular maintenance and troubleshooting ensure reliable performance and safety.

Safety Tips and Guidelines

Never ignore the CO alarm. Ensure proper installation and maintenance. Use battery-powered detectors indoors and follow manufacturer instructions. Stay informed about CO dangers and prevention methods.

6.1 Understanding Carbon Monoxide Dangers

Carbon monoxide (CO) is a colorless, odorless, and deadly gas produced by incomplete combustion of fuels. It can emanate from faulty heating systems, generators, or improperly ventilated appliances.

Prolonged exposure to CO can cause severe health issues, including headaches, dizziness, and even death. Understanding these risks is crucial for ensuring timely evacuation and proper detector installation to safeguard your home and family from this invisible threat. Always prioritize CO safety to prevent tragic outcomes.

6.2 What to Do When the CO Alarm Sounds

If your First Alert CO detector alarms, stay calm and act quickly. Immediately evacuate everyone from the home, including pets, and move to fresh air outside.

Call emergency services or your local fire department from a safe location. Do not re-enter your home until authorities confirm it is safe. Open windows only if time permits, but do not delay evacuation; Never attempt to locate the CO source yourself, and avoid using fans or vents to dissipate the gas. Remember, ignoring the alarm can lead to severe illness or death. Always prioritize safety and follow evacuation procedures promptly.

6.3 Preventing False Alarms

To minimize false alarms, ensure your First Alert CO detector is installed correctly and maintained regularly. Test the alarm monthly and clean the detector to remove dust or debris that may trigger false alerts.

Avoid installing the detector near cooking appliances, as small amounts of CO from normal household activities can cause false alarms. Ensure proper ventilation in areas like garages or near fuel-burning appliances. Always use a battery-powered or battery-backup CO alarm and replace batteries as needed to prevent low-battery chirps, which can be mistaken for an actual alarm. Regular maintenance helps ensure reliable performance and reduces unnecessary disruptions.

Accessing Additional Resources

For more detailed instructions or support, visit the First Alert website at www.firstalert.com. Download the full manual or contact customer support for assistance.

Call 1-800-323-9005 for help with your First Alert CO detector. Additional resources include troubleshooting guides and FAQs to ensure optimal performance and safety.

7.1Downloading the Full Manual

7.1 Downloading the Full Manual

To access the complete manual for your First Alert CO detector, visit the official First Alert website at www.firstalert.com.

Navigate to the “Support” section, locate your specific model, and download the PDF manual. This resource provides detailed instructions, troubleshooting tips, and safety guidelines.

Ensure you have the correct model number, such as CO400, for accurate information. The manual is available free of charge and is essential for proper installation and operation.

Refer to it for comprehensive guidance on maintaining your detector and understanding its features for optimal safety and performance.

7.2 Contacting First Alert Customer Support

For assistance with your First Alert CO detector, contact customer support at 1-800-323-9005. This service is available to address installation, troubleshooting, or general inquiries.

Visit the official website at www.firstalert.com for additional resources, including FAQs and product-specific guidance. Representatives are ready to help ensure your detector functions properly and safely.

Reach out if you need a replacement manual, technical advice, or clarification on any features. Prompt support is crucial for maintaining your safety and the effectiveness of your CO alarm.

The First Alert CO Detector Manual ensures safe and effective use of your carbon monoxide alarm, promoting household safety and peace of mind through proper installation and maintenance.

8.1 Final Thoughts on Safe Usage

Always adhere to the manual’s guidelines for optimal performance and safety; Regularly test your First Alert CO detector and ensure proper installation. Understand that carbon monoxide is odorless and invisible, making your detector a vital life-saving device. Never ignore the alarm; if it sounds, evacuate immediately and call emergency services. By following these steps, you ensure the safety of your household and gain peace of mind.

bosch oven user guide

Welcome to the Bosch Oven User Guide! This guide provides essential information for safe and efficient operation, helping you unlock your oven’s full potential. Explore features, maintenance tips, and troubleshooting solutions to enhance your cooking experience and master your appliance.

Overview of Bosch Oven Features

Bosch ovens are designed to offer a seamless and efficient cooking experience. They feature advanced functions like AutoPilot, which simplifies cooking specific dishes by pre-programming settings. Multiple cooking modes, including conventional, convection, and grill options, provide versatility. The user-friendly touch control panel allows easy navigation, while smart connectivity enables integration with home networks for remote monitoring. Safety features such as child safety locks and automatic shut-off enhance security. Energy efficiency is prioritized with eco-friendly modes, reducing power consumption. Durable materials and sleek designs ensure longevity and aesthetic appeal. These features make Bosch ovens a versatile and reliable choice for modern kitchens, catering to diverse cooking needs.

Importance of Reading the User Manual

Reading the Bosch Oven user manual is essential for safe and optimal use. It provides crucial safety guidelines, such as fire prevention tips and proper cleaning procedures, to avoid hazards. The manual outlines features like AutoPilot and advanced cooking modes, ensuring you maximize your oven’s capabilities. It also covers maintenance tips, like cleaning before first use and regular care, to prolong the appliance’s lifespan. Troubleshooting sections help resolve common issues independently, saving time and effort. Understanding warranty details and customer support options is also vital. By following the manual, you ensure efficient, safe, and enjoyable cooking experiences while protecting your investment in the Bosch Oven.

Safety Precautions and Basic Maintenance

Ensure the oven is switched off before cleaning, and avoid harsh chemicals. Regularly remove food residues to prevent fires and maintain performance; Always refer to the manual for detailed maintenance instructions.

Fire Safety Guidelines

To ensure safe operation, always follow fire safety guidelines. Keep the oven clean, as food remnants can ignite. Never leave cooking unattended, especially at high temperatures. If a fire occurs, switch off the oven and unplug it if possible. Close the oven door to starve the flames of oxygen. Never use water to extinguish grease fires. Keep a fire extinguisher nearby and ensure it’s easily accessible. Avoid wearing loose clothing near the oven to prevent accidental ignition. Regularly inspect heating elements for damage. Follow these precautions to maintain a safe cooking environment and prevent potential hazards. Always refer to the manual for detailed safety instructions.

Cleaning the Oven Before First Use

Before using your Bosch oven for the first time, clean it thoroughly to remove any manufacturing residues. Wipe the interior with a clean, damp cloth and a mild dish detergent. Avoid harsh chemicals or abrasive cleaners, as they may damage the surfaces. After cleaning, dry the oven thoroughly with a soft cloth. To reduce any first-use odor, run a 30-minute bake cycle at 350°F (175°C). This step ensures the oven is ready for cooking and free from any unwanted smells. Properly cleaning and preparing your oven before first use guarantees optimal performance and a fresh cooking environment for years to come.

Operating the Bosch Oven

Set the desired temperature using the dial and timer function for precise control. Use pre-programmed AutoPilot settings for effortless cooking; Explore advanced features for enhanced culinary results.

Setting Temperature and Timer

To set the temperature, use the control dial to select your desired heat level in 10°F or 5°C increments. For the timer, utilize the dedicated buttons or timer function to input cooking duration. Press start to begin the cycle. Ensure the oven preheats before placing food inside for optimal results. Always double-check your settings before starting to avoid errors. Proper temperature and timing ensure perfectly cooked dishes every time. This feature is essential for achieving consistent cooking outcomes with your Bosch oven.

Using Advanced Cooking Features

Your Bosch oven offers advanced cooking features designed to simplify and enhance your culinary experience. The AutoPilot function allows you to select pre-programmed settings for specific dishes, ensuring precise temperature and cooking times. Sensors automatically adjust heat and duration for optimal results. Explore steam cooking for healthier meals, and use smart connectivity to control your oven via a mobile app. Additional features like eco-mode reduce energy consumption while maintaining performance. These advanced options make cooking easier and more efficient, allowing you to achieve professional-grade results with minimal effort. Familiarize yourself with these features to unlock your oven’s full potential and elevate your cooking skills.

Maintenance and Troubleshooting

Regularly clean your Bosch oven to maintain performance and safety. Troubleshooting common issues like error codes or faulty sensors can often resolve problems without professional help. Always refer to your user manual for specific guidance and solutions to ensure your oven operates efficiently and effectively. Proper care extends the appliance’s lifespan and prevents malfunctions, keeping your kitchen running smoothly.

Regular Cleaning and Care Tips

Regular cleaning is essential to maintain your Bosch oven’s performance and hygiene. Before first use, wipe the interior with a damp cloth and mild detergent, then dry thoroughly. For routine maintenance, clean food residues promptly to prevent buildup. Use Bosch-approved cleaning products or a mixture of water and baking soda for gentle yet effective cleaning. Avoid abrasive materials that could scratch surfaces. Run a cleaning cycle or a 30-minute bake at 350°F to reduce odors. Always unplug the oven before deep cleaning. Regular care ensures optimal cooking results and prolongs the appliance’s lifespan; Keep your oven in pristine condition for years of reliable service.

Common Issues and Solutions

Troubleshooting your Bosch oven can be straightforward with the right approach. A non-responsive touch panel may require resetting the appliance by unplugging it for 30 seconds. If the oven door won’t unlock, ensure it has fully cooled down. For issues like uneven heating, check if the racks are correctly positioned and the oven is preheated properly. Error codes often indicate specific problems, so refer to your user manual for interpretations. Regular cleaning can prevent grease buildup, which might cause malfunctions. If problems persist, contact Bosch customer support or a certified technician for assistance. Timely solutions ensure your oven operates efficiently and safely.

Understanding the User Interface

Your Bosch oven features an intuitive interface designed for easy navigation. The control panel includes a clear LCD display, temperature controls, and function buttons for seamless operation and customization.

Navigating the Control Panel

Navigating the Bosch oven’s control panel is straightforward. Start by selecting the desired cooking mode using the function buttons. Adjust temperature and timer settings with the dial or numeric keypad. The LCD display clearly shows your selections, ensuring precise control. For advanced features, use the touch-sensitive buttons to access options like AutoPilot or smart home integration. The interface is designed to be user-friendly, allowing you to customize settings and monitor cooking progress effortlessly. Familiarize yourself with the layout to make the most of your oven’s capabilities and enjoy a seamless cooking experience every time.

Customizing User Settings

Customizing your Bosch oven’s settings enhances your cooking experience. Access the settings menu via the control panel to adjust language, display brightness, and unit preferences. Select from Celsius or Fahrenheit for temperature readings. You can also program favorite cooking modes or preset temperatures for frequently used recipes. For models with smart connectivity, sync your preferences across devices. Refer to the user manual for detailed steps on accessing and modifying these settings. Personalizing your oven ensures it adapts to your culinary needs, making cooking more intuitive and enjoyable. Explore these options to tailor your appliance to your lifestyle and preferences for optimal performance.

Accessing Additional Resources

For further assistance, visit the Bosch website to download user manuals, installation guides, and troubleshooting tips. Contact customer support for personalized help or repairs. Explore FAQs and expert advice online to maximize your oven’s performance and address any queries promptly.

Downloading Bosch Oven Manuals

To access detailed instructions and guidance for your Bosch oven, visit the official Bosch website. Navigate to the support section and enter your oven’s model number (E-Nr.) to download the specific user manual. These manuals are available in PDF format, making them easy to save and print. Additionally, you can find installation guides, troubleshooting tips, and technical specifications. For further assistance, Bosch customer support is available via phone, email, or live chat. Ensure you have your model number ready for quicker service. Downloading the manual is a convenient way to explore your oven’s features, maintenance tips, and error-solving solutions anytime, anywhere.

Contacting Customer Support

For any questions or issues with your Bosch oven, reaching out to customer support is straightforward. Visit the official Bosch website and navigate to the contact section. You can call their toll-free number at (800) 944-2904 for immediate assistance or utilize the live chat feature. Additionally, fill out the contact form on their website to receive a prompt response. Bosch also offers an optional one-minute survey to improve their services. Remember to have your oven’s model number (E-Nr.) ready to expedite support. Whether troubleshooting, requesting repair, or seeking expert advice, Bosch’s dedicated team is available to ensure your appliance performs optimally. Their support options provide quick solutions to enhance your cooking experience.

dewalt 1600 jump starter manual

The DeWalt 1600 Jump Starter is a powerful, portable solution for vehicles, combining 1600 peak amps with a digital air compressor and USB charging ports for convenience.

Overview of the Product

The DeWalt 1600 Jump Starter is a versatile, high-performance tool designed for jump-starting vehicles and inflating tires. It features 1600 peak amps, a digital air compressor with AUTOSTOP, and dual USB ports for charging devices. Built with a portable design and an integrated light, it’s ideal for emergency situations. The unit also includes safety features and a lithium battery for reliable power on the go, making it a must-have for car owners and outdoor enthusiasts.

Importance of the Manual

The manual is essential for safe and effective use of the DeWalt 1600 Jump Starter. It provides detailed instructions, safety guidelines, and troubleshooting tips, ensuring users understand proper operation. Reading it helps prevent accidents, optimizes performance, and prolongs the product’s lifespan. The manual also outlines warranty information and maintenance tips, making it a crucial resource for owners to maximize the tool’s benefits and ensure longevity.

Key Features of the DeWalt 1600 Jump Starter

The DeWalt 1600 Jump Starter offers 1600 peak amps, a 120 PSI digital air compressor, USB-A and USB-C charging ports, and a portable design with a built-in light.

Peak Amps and Jump-Starting Capacity

The DeWalt 1600 Jump Starter delivers 1600 peak amps, providing reliable jump-starting power for vehicles with up to 8-liter gas or 6-liter diesel engines. Its robust capacity ensures quick starts even in cold conditions, making it ideal for cars, trucks, and SUVs. This high-performance capability is essential for emergency situations, ensuring drivers can get back on the road without delay or professional assistance.

Digital Air Compressor with AUTOSTOP

The DeWalt 1600 features a 120 PSI digital air compressor equipped with AUTOSTOP technology, automatically shutting off when the desired pressure is reached. This prevents over-inflation and ensures safety. The SureFit nozzle provides a secure connection to tires, while the digital display offers precise pressure control. Ideal for inflating tires, sports equipment, and more, this compressor combines efficiency with ease of use, enhancing versatility for various applications. Its compact design adds portability, making it a practical accessory for any vehicle owner.

USB Charging Ports (USB-A and USB-C)

The DeWalt 1600 includes dual USB ports, USB-A and USB-C, offering convenient charging for smartphones, tablets, and other devices. With fast-charging capabilities, these ports ensure your devices stay powered on the go. The USB-C port supports higher power delivery, making it ideal for charging modern electronics efficiently. This feature adds versatility, allowing the jump starter to function as a portable power bank, enhancing its utility beyond jump-starting vehicles. This ensures you stay connected and productive anywhere.

Portable Design and Built-in Light

The DeWalt 1600 features a compact, lightweight design for easy transport, making it ideal for emergency roadside use. Equipped with a built-in LED light, it illuminates work areas in low-light conditions, enhancing visibility and safety. This design ensures the jump starter is both portable and practical, catering to various scenarios, from vehicle emergencies to outdoor activities. Its portability and lighting functionality make it a versatile tool for everyday and unexpected situations.

Safety Instructions for Proper Use

Always ensure the work area is clean and well-lit to prevent accidents. Avoid operating in explosive atmospheres and follow all electrical safety guidelines to ensure safe usage.

General Safety Precautions

Keep the work area clean and well-lit to minimize accident risks. Avoid operating in explosive atmospheres and ensure proper ventilation. Always read the manual before use and follow all guidelines to ensure safe operation. Never use abrasive cut-off wheels on mitre saws, as they are designed for cutting wood. Adhere to all safety instructions to prevent accidents and ensure optimal performance of the DeWalt 1600 Jump Starter.

Work Area Safety Tips

Ensure your work area is clean, well-lit, and free from clutter to reduce accident risks. Avoid operating the jump starter in explosive or flammable environments. Keep the area well-ventilated, especially when using the air compressor. Ensure the surface is stable and level to prevent the device from tipping. Keep flammable materials away when inflating tires or charging. Secure loose clothing and tie back long hair to avoid entanglement with moving parts.

Electrical Safety Guidelines

  • Always follow proper charging procedures to avoid electrical hazards.
  • Never modify or tamper with the jump starter’s electrical components.
  • Ensure the device is used in dry conditions to prevent short circuits.
  • Avoid using damaged cables or connectors to minimize shock risks.
  • Keep the jump starter away from water and moisture.
  • Use only the provided chargers and adapters for safe operation.

Technical Specifications of the DeWalt 1600

The DeWalt 1600 features 1600 peak amps, a 120 PSI digital compressor, and USB-A/USB-C ports for charging, designed for reliable performance and versatility in various applications.

Peak Current and Battery Capacity

The DeWalt 1600 delivers 1600 peak amps, ensuring strong jump-starting power for cars and trucks. Its lithium battery provides reliable energy storage, supporting multiple jumps on a single charge. The unit also features dual USB ports for charging devices, making it a versatile emergency power source. Designed for durability, the battery maintains performance across various temperatures, ensuring consistent reliability in different conditions.

Charging Capabilities

The DeWalt 1600 supports multiple charging options, including a home AC charger, car DC charger, and USB charging cable. This versatility allows users to recharge the lithium battery from various power sources, ensuring convenience on the go. The battery’s advanced charging system optimizes energy intake, minimizing charge times while maximizing performance and longevity. This feature makes it ideal for emergency use in different environments.

Compressor Features (PSI, AUTOSTOP, SureFit Nozzle)

The DeWalt 1600 features a 120 PSI digital air compressor with AUTOSTOP technology, automatically shutting off when the desired pressure is reached. The SureFit nozzle ensures a secure, leak-free connection to tires, while the digital display provides precise pressure monitoring. This combination enhances efficiency, safety, and ease of use for inflating tires and other inflatables, making it a versatile tool for various applications.

How to Use the Jump Starter Effectively

Connect the clamps correctly to the battery terminals, ensuring polarity is right to avoid sparks. Start the engine and monitor connections for proper operation and safety.

Step-by-Step Jump-Starting Process

Ensure the vehicle is turned off and in park. Locate the battery and attach clamps securely to terminals, red to positive and black to negative. 2. Turn on the jump starter and let it power the vehicle. 3. Start the engine and remove clamps in reverse order. 4. Recharge the unit if necessary. Always follow safety guidelines to avoid sparks or electrical hazards during the process.

Using the Digital Air Compressor

Turn on the compressor and set the desired pressure using the digital display. 2. Attach the SureFit nozzle to the tire valve stem for a secure connection. 3. Monitor the pressure gauge to avoid over-inflation. 4. The AUTOSTOP feature will automatically shut off the compressor when the set pressure is reached. 5. Turn off the compressor and release any remaining pressure before detaching the nozzle.

Charging the Battery

Use the provided AC or DC charger to charge the battery. 2. Plug the charger into a power source and connect it to the jump starter. 3. Charge in a well-ventilated area, away from flammable materials. 4. Monitor the charge level using the built-in indicator. 5. Avoid overcharging by disconnecting once the battery is fully charged. 6. Store the charger and cable securely after use.

Battery Maintenance and Care

Regularly inspect the battery for signs of wear or damage. Avoid extreme temperatures and overcharging. Store in a dry, cool place when not in use.

Best Practices for Charging

Charge the battery using the provided AC or DC charger. Avoid overcharging by stopping once the indicator shows full charge. Store the unit in a cool, dry place after charging. Always monitor charge levels and follow the manual’s guidelines for optimal performance and longevity of the battery.

Storage Recommendations

Store the DeWalt 1600 Jump Starter in a cool, dry place away from direct sunlight and moisture. Keep it away from flammable materials and avoid extreme temperatures. Ensure the battery is charged to at least 50% before storage to prevent deep discharge. Regularly check the battery level during storage and charge as needed to maintain health and performance. Always follow the manual’s guidelines for proper storage.

Signs of Battery Wear

Look for signs like reduced jump-starting power, longer charging times, and battery swelling. If the unit takes longer to charge or doesn’t hold a charge well, it may indicate wear. Additionally, if the battery drains quickly or the jump starter’s performance diminishes over time, it’s a sign that the battery needs attention or replacement. Always refer to the manual for specific guidelines on assessing battery health.

Digital Air Compressor Operation

The DeWalt 1600 features a 120 PSI digital air compressor with AUTOSTOP for safe, efficient tire inflation. Use the SureFit nozzle for secure connections and precise control.

Understanding AUTOSTOP Functionality

The AUTOSTOP feature automatically shuts off the compressor when the desired pressure is reached, preventing over-inflation. This enhances safety and prolongs tire life by maintaining precise control during inflation tasks.

Using the SureFit Nozzle

The SureFit nozzle is designed for easy, leak-free connections to tire valves. Align the nozzle with the valve stem, press firmly, and hold until inflation begins. Its secure fit ensures efficient airflow, reducing wasted effort. After use, store the nozzle securely to avoid damage. This feature simplifies tire inflation, making it quicker and more straightforward for users of the DeWalt 1600 Jump Starter.

Tire Inflation Guidelines

Always check tire pressure before inflation, using the vehicle’s recommended PSI. Attach the SureFit nozzle securely to the valve stem. Turn on the compressor and monitor pressure via the digital display. The AUTOSTOP feature prevents over-inflation by shutting off automatically. Inflate tires in a well-ventilated area, away from direct sunlight, to ensure accurate pressure readings and safe operation with the DeWalt 1600 Jump Starter.

Troubleshooting Common Issues

  • If the battery won’t charge, ensure connections are secure and try a different outlet.
  • For compressor issues, check for blockages and ensure the AUTOSTOP feature isn’t engaged.
  • If USB ports malfunction, try using original cables or resetting the device.

Diagnosing Battery Problems

To diagnose battery issues with your DeWalt 1600 Jump Starter, start by checking the charge level using the built-in display. Ensure all connections are clean and secure. If the battery won’t hold a charge, inspect for signs of wear or damage. Slow engine cranking or dim lights indicate a weak battery. Refer to the manual for detailed troubleshooting steps and charging guidelines to restore functionality.

Compressor Malfunction Solutions

If the compressor fails to turn on, ensure the power button is functioning and connections are secure. Check for blockages in the SureFit nozzle and verify tire pressure matches the recommended level. If the compressor runs but doesn’t reach desired PSI, inspect the AUTOSTOP feature and ensure it’s not engagement prematurely. Consult the manual for reset procedures or contact DeWalt support for further assistance if issues persist.

USB Port Troubleshooting

If the USB ports are not functioning, ensure the jump starter is fully charged and powered on. Try using a different USB cable or device to rule out cable damage. Clean the ports gently with a soft cloth to remove debris. If issues persist, reset the unit by turning it off and on. Contact DeWalt customer support for further assistance or potential repairs if the problem continues;

Warranty and Customer Support

DeWalt provides a limited warranty for the 1600 Jump Starter, covering manufacturing defects. Register your product for extended support. Contact customer service via phone, email, or the official website for inquiries and repairs.

DeWalt Warranty Coverage

DeWalt offers a limited warranty for the 1600 Jump Starter, covering defects in materials and workmanship. The warranty period varies by component, with the lithium-ion battery typically covered for 3 years. Proper registration and adherence to usage guidelines are required for warranty validation. Repairs or replacements are provided at no cost during the warranty period. Visit the official DeWalt website for detailed terms and conditions.

Contacting Customer Service

For assistance with the DeWalt 1600 Jump Starter, visit the official DeWalt website to access contact information. Phone support is available for immediate inquiries, while email support provides detailed assistance. Additionally, the website offers a “Contact Us” section with regional offices listed for location-specific support. Ensure to have your model number and serial number ready for efficient service. DeWalt’s customer service team is available to address any questions or concerns.

The DeWalt 1600 Jump Starter is a reliable, versatile tool for vehicle emergencies and inflation needs, backed by DeWalt’s trusted quality and customer support.

Final Thoughts on the DeWalt 1600

The DeWalt 1600 Jump Starter is a robust, multi-functional device designed for vehicle emergencies, offering 1600 peak amps, a digital compressor, and USB ports. Its portability and built-in light enhance usability. Safety features and detailed instructions ensure reliable performance. With DeWalt’s reputation for quality, this tool is an excellent choice for drivers seeking a dependable emergency solution.

manual safety

Manual safety involves practices and procedures to minimize risks associated with lifting‚ pushing‚ and pulling. It focuses on preventing injuries and ensuring a safe working environment. Proper techniques‚ risk assessments‚ and employee training are key components to reducing workplace hazards effectively.

Key Principles of Manual Safety

Manual safety revolves around assessing tasks‚ planning lifts‚ using proper techniques‚ staying within personal limits‚ and maintaining physical fitness to prevent injuries and ensure safe practices.

Assess the Task

Assessing the task is the first step in manual safety‚ involving evaluating the load‚ environment‚ and personal capabilities. Check the weight‚ balance‚ and size of the object‚ ensuring it can be safely handled. Consider the path for moving the load‚ removing obstacles to prevent tripping or collisions. Evaluate your physical condition and strength relative to the task. Use risk assessments to identify potential hazards‚ such as uneven surfaces or awkward postures. Involve colleagues if the task is too demanding. Proper assessment helps prevent injuries‚ reduces physical strain‚ and ensures compliance with safety regulations. It also minimizes legal risks and promotes a culture of safety in the workplace.

Plan the Lift

Planning the lift is crucial for manual safety‚ ensuring the task is executed safely and efficiently. Start by deciding how to approach the lift‚ considering the object’s weight‚ size‚ and shape. Walk the route beforehand to identify obstacles and ensure a clear path. Determine whether mechanical aids‚ like trolleys or pulleys‚ are needed to reduce physical strain. If the load is too heavy or awkward‚ involve colleagues to share the effort. Communicate clearly with your team to coordinate movements‚ especially in group lifts; Proper planning minimizes risks‚ prevents accidents‚ and ensures the task is completed without injury. It also helps in maintaining compliance with workplace safety standards and regulations.

Use Proper Lifting Techniques

Proper lifting techniques are essential to prevent injuries and ensure manual safety. Always bend at the knees‚ maintaining a straight back to lift objects. Keep the load close to your body to minimize strain on your muscles. Avoid twisting while lifting‚ as this can lead to spinal injuries. Use two hands to lift or carry objects for better control and balance. If the object is too heavy or awkward‚ consider using mechanical aids like trolleys or pulleys. Proper posture and lifting methods help reduce the risk of workplace accidents. Regular training and practice of these techniques ensure they become second nature‚ promoting a safer and more efficient working environment. Stay fit and healthy to handle manual tasks effectively.

Know Your Limits

Knowing your physical limits is crucial for manual safety. Assess your strength‚ stamina‚ and ability to handle specific tasks without risking injury. Avoid lifting objects that exceed your capacity or require excessive strain. Recognize when a load is too heavy or awkward and seek assistance or mechanical aids. Understanding your limitations ensures you can perform tasks safely and efficiently. Regularly evaluate your fitness level and adjust your approach to manual handling accordingly. This self-awareness helps prevent overexertion and reduces the likelihood of workplace accidents. Always prioritize your health and safety by staying within your capabilities and seeking help when needed.

Stay Fit and Healthy

Staying physically fit and healthy is essential for manual safety. Regular exercise‚ such as core strengthening and flexibility workouts‚ improves posture and reduces injury risks. A healthy lifestyle‚ including a balanced diet and adequate rest‚ enhances overall physical resilience. Employers often encourage wellness programs to promote employee fitness‚ which directly benefits manual handling tasks. Maintaining a healthy weight and avoiding harmful habits‚ such as smoking or excessive alcohol‚ further supports physical capability. By prioritizing fitness‚ individuals can perform manual tasks more safely and efficiently‚ reducing the likelihood of strain or injury. Regular health check-ups and proactive health management are also key to sustaining long-term physical well-being.

Safety Practices for Manual Handling

Essential practices include assessing loads‚ using mechanical aids‚ maintaining proper posture‚ and avoiding hazardous movements. These strategies reduce injury risks and ensure tasks are performed safely and efficiently.

Proper Lifting Techniques

Proper lifting techniques are crucial to prevent injuries and ensure safe manual handling. Start by assessing the load‚ plan your lift‚ and maintain a stable position. Bend at the knees‚ keep the object close to your body‚ and avoid twisting. Use both hands to grasp the load firmly‚ and lift with your leg muscles rather than your back. Keep the object at waist height and avoid lifting above shoulder level if possible. Move smoothly and avoid sudden jerks. If the load is too heavy‚ consider using mechanical aids or seeking assistance. Regular training and practice help reinforce these techniques and reduce workplace hazards effectively.

Use of Mechanical Aids

Using mechanical aids is an essential part of manual safety‚ reducing physical strain and preventing injuries. Tools like pallet jacks‚ trolleys‚ and hoists can simplify tasks involving heavy or bulky loads. These aids minimize the need for excessive lifting‚ bending‚ or twisting‚ which are common causes of workplace injuries. Employers should assess tasks to determine when mechanical aids are necessary and ensure they are readily available. Employees must be trained to use these devices correctly to maximize their effectiveness. Regular maintenance of mechanical aids is also crucial to ensure they function safely and efficiently. By incorporating mechanical aids into workflows‚ organizations can significantly reduce the risks associated with manual handling tasks.

Maintaining Proper Posture

Maintaining proper posture is crucial for manual safety‚ as it reduces the risk of injury during lifting and carrying tasks. Bend at the knees‚ keep your back straight‚ and hold the load close to your body to minimize strain. Avoid twisting or overreaching‚ as these movements can lead to muscle strain or spinal injury. Proper posture ensures that the body’s muscles are used efficiently‚ distributing the weight evenly and reducing fatigue. Employers should provide training on correct postural techniques‚ and employees should practice these methods consistently. Regular breaks and stretching can also help maintain proper posture and overall physical well-being during manual handling tasks.

Avoiding Hazardous Movements

Avoiding hazardous movements is essential to prevent injuries during manual handling. Actions such as twisting‚ stooping‚ or overreaching can strain muscles and joints‚ leading to harm. To minimize risks‚ maintain a stable stance and turn with your feet instead of twisting your torso. Keep the load close to your body to reduce the need for stretching or reaching. Additionally‚ avoid sudden jerks or abrupt movements‚ as they can cause loss of control or imbalance. Employers should train employees to recognize and avoid such hazardous movements‚ while employees should stay mindful of their body positioning and movement patterns during tasks. Regular safety drills and reminders can reinforce these practices and promote a safer work environment.

Legal Responsibilities and Regulations

Employers must conduct risk assessments‚ provide safe procedures‚ and ensure compliance with manual handling regulations. Employees must follow guidelines and report hazards‚ while regulations enforce accountability for workplace safety.

Employer Duties

Employers are legally required to ensure a safe working environment by conducting risk assessments and implementing safe manual handling procedures. They must provide training‚ supervision‚ and necessary equipment to prevent injuries. Employers should also maintain records of safety practices and ensure compliance with regulations like the Management of Health and Safety at Work Regulations. Regular monitoring of workplace conditions and employee well-being is essential to mitigate hazards. Employers must take corrective actions if risks are identified‚ ensuring all tasks are performed safely. Failure to meet these duties can result in legal consequences‚ emphasizing the importance of proactive management in safeguarding employee health and safety.

Employee Responsibilities

Employees play a crucial role in maintaining manual safety by following established guidelines and practices. They must assess tasks‚ use proper lifting techniques‚ and avoid hazardous movements. Employees should report any risks or unsafe conditions to their employers promptly. Participating in training sessions and adhering to safety instructions is essential. Staying physically fit and avoiding unnecessary strain during manual tasks are also key responsibilities. Employees must ensure they understand and follow all safety protocols‚ as their active involvement significantly reduces workplace injuries. By taking personal responsibility for their actions‚ employees contribute to a safer and healthier work environment for everyone.

Compliance with Safety Regulations

Compliance with safety regulations is essential to ensure a safe working environment and minimize risks associated with manual handling. Employers and employees must adhere to legal requirements‚ such as the Management of Health and Safety at Work Regulations‚ which mandate risk assessments and appropriate safety measures. Regular audits and inspections should be conducted to verify adherence to these standards. Proper documentation of safety practices and training records is also required. Non-compliance can result in legal penalties and increased workplace hazards. By following established regulations‚ organizations can create a culture of safety‚ reduce injuries‚ and promote a healthy workforce. Compliance ensures that all manual handling tasks are performed safely and efficiently.

Training and Education in Manual Safety

Effective training and education are critical for reducing manual handling risks. Employers must provide regular‚ job-specific instruction to ensure employees understand safe practices and procedures‚ promoting a safer workplace.

Essential Training Topics

Essential training topics in manual safety include understanding the risks of manual handling‚ proper lifting techniques‚ and the use of mechanical aids. Employees should learn how to assess tasks‚ plan lifts‚ and maintain proper posture to avoid injuries. Training also covers recognizing personal limits and the importance of staying physically fit. Additionally‚ sessions should address avoiding hazardous movements‚ such as bending and twisting‚ and emphasize the importance of regular training participation. These topics ensure workers can perform tasks safely and efficiently‚ reducing the likelihood of workplace accidents and promoting a culture of safety.

Role of Supervisors in Safety

Supervisors play a crucial role in promoting manual safety by ensuring safe work practices are followed. They are responsible for providing proper training‚ monitoring compliance with safety protocols‚ and addressing potential risks. Supervisors should lead by example‚ demonstrating correct lifting techniques and encouraging employees to report unsafe conditions. They also conduct regular risk assessments and ensure that mechanical aids are available when needed. Additionally‚ supervisors are key in fostering a safety-first culture‚ promoting regular training‚ and ensuring employees understand their responsibilities. Their proactive approach helps prevent injuries and maintains a safe working environment‚ acting as a bridge between management and employees in safety matters.

ls wiring harness instructions

Installing an LS wiring harness is crucial for a successful engine swap. This guide provides detailed steps for LS wiring harness installation, troubleshooting, and system integration, ensuring a seamless setup for your vehicle.

Tools and Materials Needed for LS Wiring Harness Installation

Essential tools include a wiring diagram, multimeter, and hand tools. Materials needed are heat shrink tubing, connectors, and zip ties for a secure and professional installation.

Essential Tools for Wiring Harness Installation

For a successful LS wiring harness installation, gather essential tools to ensure accuracy and efficiency. A wiring diagram is crucial for identifying connectors and wire functions. A multimeter is necessary for testing voltage and continuity. Basic hand tools like pliers, screwdrivers, and wrenches are required for connector removal and installation. Heat shrink tubing and a heat gun are needed for insulating and protecting connections. Wire strippers and crimpers are essential for modifying or repairing wires. A soldering iron can be useful for permanent connections. Zip ties and adhesive-backed clips will help organize and secure the harness. A torque wrench may be needed for specific sensor installations. Lastly, a clean, well-lit workspace and a helper can make the process smoother. These tools will help you navigate the complexities of wiring harness installation effectively.

Required Materials for a Successful LS Swap

A successful LS swap requires specific materials to ensure compatibility and functionality. A standalone wiring harness is essential, designed for your LS engine type (e.g., LS1, LS2, LS3). An Engine Control Module (ECM) or Powertrain Control Module (PCM) is necessary to manage engine operations. A Transmission Control Module (TCM) may be needed if using an automatic transmission. Fuel injectors, spark plugs, and oxygen sensors must be compatible with your LS engine. A fuel pump and fuel lines suitable for high pressure are required. Mounting brackets for the ECM and engine accessories are crucial. Wiring connectors and adapters may be needed for integration with your vehicle’s electrical system. A high-capacity alternator and battery ensure reliable power supply. Additionally, a MAF sensor and intake manifold compatible with your LS engine are essential. These components ensure a smooth and functional LS swap, addressing both engine and electrical system requirements.

Understanding the Anatomy of an LS Wiring Harness

An LS wiring harness consists of key components like the ECM, sensors, and connectors; It’s designed to integrate seamlessly with your vehicle’s electrical system, ensuring proper engine function and communication.

Identifying Key Connectors and Components

When working with an LS wiring harness, it’s essential to identify key connectors and components. The Engine Control Module (ECM) is the brain of the system, controlling fuel injection, ignition timing, and more. Sensors such as the Mass Airflow Sensor (MAF), Throttle Position Sensor (TPS), and Oxygen Sensors are critical for accurate engine performance. Connectors like the main engine harness connector and transmission connector ensure proper communication between components. Familiarizing yourself with these parts helps in troubleshooting and installation. Proper labeling and organization are recommended to avoid confusion during the process. Ensuring all connectors are securely attached and free from corrosion is vital for reliable operation. This step lays the foundation for a successful LS swap, allowing your vehicle to function efficiently and maintain optimal performance;

Decoding Wire Colors and Their Functions

Understanding the color coding of wires in an LS wiring harness is crucial for proper installation and troubleshooting. Each color corresponds to a specific function, ensuring accurate connections. For example, yellow wires often represent battery power, while pink wires may indicate ignition-related circuits. Fuel injector wires are typically blue, and oxygen sensor wires are usually gray or white. Ground wires are commonly black or brown. Using a wiring diagram specific to your LS engine is essential for decoding these colors accurately. This ensures that sensors, actuators, and electronic components are connected correctly. Proper identification prevents electrical issues and ensures the engine runs smoothly. By referencing the wiring diagram and using tools like a multimeter, you can verify connections and diagnose faults efficiently. This step is vital for a successful LS swap, as incorrect wiring can lead to poor performance or engine failure.

Preparing the Engine Bay for Wiring Harness Installation

Properly preparing the engine bay ensures a smooth LS wiring harness installation. Clean and organize the area, remove unnecessary components, and inspect existing wiring. Mounting the ECM and associated components securely is essential for optimal performance and reliability. Ensure all connections are accessible and properly grounded.

Cleaning and Organizing the Engine Bay

Cleaning and organizing the engine bay is a critical first step in any LS wiring harness installation. Start by removing dirt, grime, and old wiring to ensure a clean workspace. This prevents damage to the new harness and ensures proper connections. Use protective coverings for sensitive components to avoid contamination. Organize existing wires and components, labeling them for clarity. A well-prepared engine bay not only simplifies the installation process but also reduces the risk of electrical issues down the line. Take the time to inspect for any rust or corrosion and address these issues before proceeding. A clean and organized engine bay will make the installation of your LS wiring harness much smoother and less prone to complications.

  • Remove dirt and debris thoroughly.
  • Protect sensitive components with coverings.
  • Label and organize existing wiring.
  • Inspect for rust or corrosion and address it.

By doing this, you’ll create a clean, efficient workspace for your LS wiring harness installation.

Mounting the ECM and Associated Components

Mounting the Engine Control Module (ECM) and its associated components is a vital step in the LS wiring harness installation. Begin by selecting a suitable location for the ECM, ensuring it is protected from heat sources like the exhaust manifold or radiator. Secure the ECM using the provided mounting bracket or a compatible alternative, ensuring it is firmly attached to prevent vibration damage. Next, connect the ECM to the wiring harness, making sure all connectors are properly seated and secured. Additionally, install any associated components such as the throttle pedal, oxygen sensor, and coolant temperature sensor, following the manufacturer’s guidelines. Proper grounding of the ECM is essential to prevent electrical interference and ensure accurate sensor readings. Finally, route the wiring harness neatly, avoiding any sharp bends or pinch points, and secure it with zip ties or clips. A well-mounted ECM and neatly organized wiring harness will ensure reliable performance and simplify future maintenance.

  • Choose a heat-protected location for the ECM.
  • Secure the ECM firmly to prevent vibration.
  • Connect all components according to manufacturer guidelines.
  • Ensure proper grounding for the ECM.
  • Route and secure the wiring harness neatly.

Step-by-Step Installation of the LS Wiring Harness

The LS wiring harness installation involves connecting the ECM to engine sensors, integrating it with the vehicle’s electrical system, and ensuring all connections are secure and properly grounded.

Connecting the ECM to the Engine Sensors

Connecting the ECM to engine sensors is a critical step in the LS wiring harness installation. Start by identifying the sensor connectors, such as the crankshaft position sensor, camshaft position sensor, and oxygen sensors. Ensure all connectors are clean and free from corrosion. Use the wiring diagram to match each sensor to its corresponding ECM port. Securely plug in each connector, making sure they click into place. Double-check the wiring for any signs of damage or wear. Once all sensors are connected, power up the ECM and use a scan tool to verify communication with each sensor. If any issues arise, refer to the troubleshooting guide to resolve connection problems. Proper sensor connection ensures accurate engine performance and prevents potential faults. Always follow the manufacturer’s guidelines for ECM sensor connections to guarantee reliability and optimal engine operation.

Integrating the Wiring Harness with the Vehicle’s Electrical System

Integrating the LS wiring harness with your vehicle’s electrical system requires careful planning and precision. Start by identifying key connections, such as the battery, ground points, and fuse box. Use the wiring diagram to ensure proper connections to the vehicle’s existing electrical components. Connect the ECM to the vehicle’s computer and other control modules, such as the transmission control module (TCM) if applicable. Ensure all power and ground wires are securely attached to the correct terminals. For vehicles with additional features like air conditioning or power steering, integrate these systems into the harness. Double-check all connections to avoid short circuits or electrical interference. Once integrated, test the system by turning the ignition on and verifying that all components function correctly. Proper integration ensures seamless communication between the LS engine and the vehicle’s electrical systems, providing reliable performance and functionality.

Troubleshooting Common Issues with LS Wiring Harnesses

Common issues with LS wiring harnesses include faulty connections, wiring diagram misunderstandings, and ECM communication errors. Check connections for damage, use wiring diagrams to trace issues, and address ECM communication problems promptly.

Identifying and Repairing Faulty Connections

Identifying and repairing faulty connections is critical for ensuring proper functionality of your LS wiring harness. Start by visually inspecting all connectors and wires for signs of damage, corrosion, or wear. Use a wiring diagram to trace connections and verify that all components are securely plugged in. Common issues include loose connections, damaged pins, or improperly routed wires. For diagnosis, use a multimeter to test for continuity and voltage drops. If a connection is faulty, clean or replace the affected pins. In cases of severe damage, such as frayed wires, cut and solder new connectors, ensuring proper insulation. Always follow proper soldering techniques to avoid introducing new issues. Regularly inspect high-stress areas, such as near the engine or transmission, where movement can cause wear. By methodically addressing each connection, you can resolve faults and ensure reliable operation of your LS engine swap.

Resolving ECM Communication Errors

ECM communication errors can disrupt the operation of your LS engine, requiring prompt attention. Begin by checking the power and ground connections to the ECM, ensuring they are clean and free from corrosion. Verify that the battery voltage is stable and within the recommended range. If using a scan tool, review any stored trouble codes to pinpoint the source of the issue. Common causes include faulty connectors, open or shorted wires, or improper wiring harness installation. Inspect the communication lines, such as the CAN bus, for damage or interference. Consult your wiring diagram to confirm that all connections are correct. If issues persist, consider reprogramming the ECM or consulting a professional. Regular maintenance and thorough troubleshooting can help resolve ECM communication errors and restore optimal engine performance. Always follow proper diagnostic procedures to ensure accurate and effective repairs.