spice rack plans pdf

Discover how to create a stylish and functional spice rack with easy-to-follow PDF plans. These designs offer customizable solutions to organize your spices, ensuring they are always within reach. Perfect for DIY enthusiasts, these plans provide step-by-step guidance for a seamless woodworking experience.

Importance of Spice Rack Plans

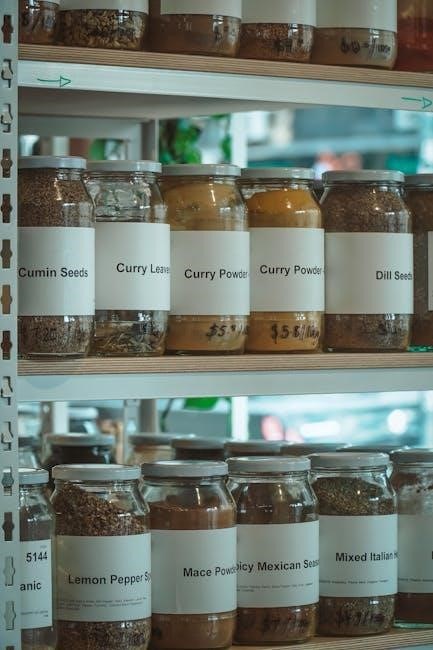
Spice rack plans are essential for creating organized and functional kitchen spaces. By using these plans, you can maximize storage while keeping your spices easily accessible, which is crucial for efficient cooking. A well-designed spice rack helps maintain a clutter-free kitchen, ensuring your spices are protected from light and moisture, which can degrade their quality. Additionally, these plans allow for customization, catering to different kitchen layouts and spice collections. Whether you prefer wall-mounted or standalone units, having a clear plan ensures your project is both aesthetically pleasing and practical. DIY enthusiasts benefit from step-by-step instructions, making it easier to achieve professional-grade results. Furthermore, spice rack plans promote sustainability by repurposing materials and minimizing waste. With the right plan, you can enhance your cooking experience while adding a personalized touch to your kitchen decor. This makes spice rack plans a valuable resource for homeowners seeking to elevate their kitchen organization and functionality.

Types of Spice Racks

Spice racks come in various forms, including wall-mounted designs for space-saving and standalone units for flexibility. These options cater to different kitchen layouts, ensuring spices are neatly organized and easily accessible. Choose the type that best suits your storage needs and style preferences.

Wall-Mounted Spice Rack Designs

Wall-mounted spice racks are a popular choice for their space-saving efficiency. These designs are ideal for kitchens with limited counter space, allowing you to maximize your walls. Many PDF plans feature adjustable shelves and customizable layouts to fit various spice bottle sizes. Some designs are specifically crafted for the inside of pantry doors, offering a convenient and hidden storage solution. Others can be mounted directly on any wall, providing easy access while cooking. The plans often include detailed measurements and cutting lists, ensuring a precise fit for your space. With options ranging from modern to rustic styles, you can choose a design that complements your kitchen decor. Additionally, wall-mounted racks keep your spices organized and prevent clutter, making them a practical addition to any home. Whether you prefer a simple, minimalist look or a more elaborate design, there’s a wall-mounted spice rack plan available to suit your needs and skill level.

Standalone Spice Rack Units

Standalone spice rack units offer a versatile and self-contained solution for organizing your spices. These designs are perfect for countertops or kitchen islands, providing easy access without the need for wall installation. Many PDF plans feature compact footprints, making them ideal for small kitchens or spaces with limited storage. Standalone racks often include multiple tiers or compartments, allowing for efficient use of space while keeping spices visible and within reach. Some designs are specifically tailored to fit standard spice bottle sizes, ensuring a neat and orderly arrangement. Additionally, these units can be crafted from a variety of materials, such as wood or metal, to match your kitchen decor. Portability is another advantage, as standalone racks can be easily moved or rearranged as needed. With detailed instructions and cutting lists provided in the plans, DIY enthusiasts can create a functional and stylish spice storage solution. Whether you prefer a modern, minimalist aesthetic or a rustic charm, standalone spice rack units offer a practical and customizable way to keep your spices organized and accessible.

Materials and Tools Required

To build a spice rack, you’ll need materials like wood, metal, or glass, depending on the design. Essential tools include a saw, drill, sandpaper, and screwdriver. Detailed cutting lists and measurements are provided in most PDF plans for accuracy.

Common Materials for Construction

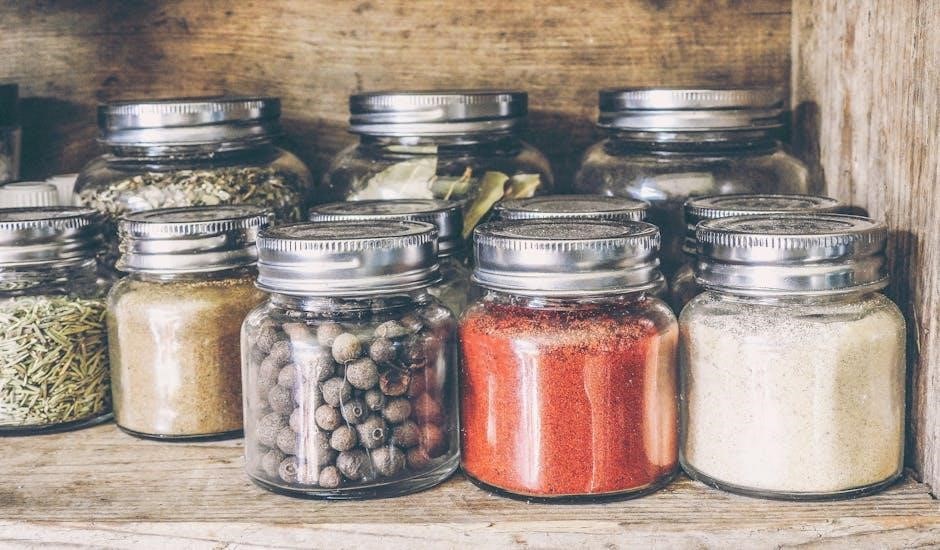
Wood is the most popular material for building spice racks, offering durability and a natural aesthetic. Common types include pine, oak, and maple, each providing unique grain patterns and finishes. Metal, such as aluminum or stainless steel, is also used for modern designs, offering sleek, rust-resistant options. Glass can be incorporated for transparent shelves, adding a contemporary touch. Plastic and composite materials are alternatives for budget-friendly projects. Reclaimed wood is a sustainable choice, ideal for eco-conscious builders. Most PDF plans specify the exact materials needed, ensuring compatibility with the design. When selecting materials, consider the intended use, style, and budget to create a functional and visually appealing spice rack.

Essential Tools Needed

Building a spice rack requires a set of basic tools to ensure precision and quality. A circular saw or handheld saw is necessary for cutting wood to the required measurements. Sandpaper is essential for smoothing out rough edges and surfaces, ensuring a polished finish. A drill is needed for creating holes for screws or dowels, while a screwdriver or screw gun helps secure the pieces together. Measuring tapes and squares are crucial for accurate cuts and alignments. Clamps are useful for holding the pieces in place while gluing or fastening. A pencil and marker are handy for marking cut lines and holes. Safety equipment, such as gloves and goggles, is important to protect yourself during the process. For more intricate designs, power tools like a router or jigsaw may be necessary. A workbench provides a stable surface for assembly. Most PDF plans list the specific tools required, making it easy to prepare before starting your project. Having these tools on hand ensures a smooth and efficient building experience.

Design Considerations

When designing a spice rack, consider the space available, the size of your spice containers, and the style of your kitchen. Measure your area carefully to ensure a perfect fit. Choose designs that complement your kitchen’s aesthetic, whether modern or traditional. Functionality is key, so prioritize easy access and visibility. Consider adjustable shelves or compartments for versatility. Some plans include features like door mounts or rotating elements for added convenience. Ensure the design aligns with your cooking habits and spice collection size. Adaptability to future changes, like adding more spices, is also worth considering. A well-thought-out design ensures your spice rack is both practical and visually appealing.

Measuring Your Space

Accurate measurements are crucial for a well-fitted spice rack. Start by assessing the dimensions of your available space, whether it’s on a wall, inside a cabinet, or on a countertop. Consider the height, width, and depth to ensure your spice rack fits seamlessly. For wall-mounted designs, measure the area carefully to avoid obstructions like light switches or outlets. If building a standalone unit, ensure it aligns with your kitchen’s workflow. Don’t forget to account for the size of your spice bottles, as this will influence the rack’s shelf spacing and overall proportions. Use a tape measure to record precise dimensions, and refer to your PDF plans to match the design specifications. Proper measurement ensures your spice rack is both functional and visually appealing. Incorrect sizing can lead to a poor fit or reduced usability, so double-check your numbers before cutting materials. By carefully measuring your space, you’ll create a spice rack that enhances your kitchen’s organization and aesthetic. This step is foundational to a successful project, so take your time to get it right.

Aesthetic Matching

Aesthetic matching is essential to ensure your spice rack complements your kitchen decor. Choose materials and designs that align with your kitchen’s style, whether modern, rustic, or minimalist. For instance, a wooden spice rack with a natural finish can blend seamlessly with traditional or country-themed kitchens, while a sleek metal or glass design suits contemporary spaces. Consider the color palette of your kitchen and select finishes like white, oak, or stainless steel to create a cohesive look. Additionally, think about the shape and size of the rack—slim designs for small spaces or larger units for ample storage; Many PDF plans offer customizable options, allowing you to tailor the rack to your aesthetic preferences. Pay attention to details like hardware, such as knobs or handles, to enhance the overall appearance. By matching your spice rack’s style to your kitchen, you create a harmonious and visually appealing environment. This step ensures your project is both functional and beautiful, elevating your kitchen’s design. A well-designed spice rack can become a decorative element, showcasing your personal style while keeping spices organized.

Locating the Best PDF Plans

Finding the right PDF plans for your spice rack is crucial for a successful project. Websites like Making Manzanita and Construct101 offer high-quality, downloadable plans designed for DIY enthusiasts. These plans often include detailed instructions, measurements, and visual cut lists to guide you through the process. Many PDFs are free, while others may require a small fee for premium designs. Look for plans that match your skill level and the specific style you want, such as wall-mounted or standalone units. Some plans cater to specific spice bottle sizes, ensuring a perfect fit. Additionally, check for customizable options, as many PDFs offer both imperial and metric measurements. Shopping lists and 3D images are also common features, making the project easier to visualize and execute. By choosing a well-structured PDF plan, you can ensure your spice rack turns out functional and stylish, enhancing your kitchen’s organization and aesthetic appeal. These resources are perfect for beginners and experienced woodworkers alike, providing clear guidance for a polished finish.

Posted in PDF

use guide perhaps crossword clue

The crossword clue “Use guide, perhaps” hints at a word or phrase combining “use” and “guide,” suggesting a tool or method for navigation or instruction, commonly seen in puzzles as “user guide.”

Overview of the Crossword Clue

The crossword clue “Use guide, perhaps” is a common riddle in many puzzles, requiring solvers to think creatively about word combinations. It often suggests a phrase or term that merges “use” and “guide” in a clever way. For example, “user guide” is a frequent solution, as it directly combines the two words. However, the clue’s ambiguity allows for multiple interpretations, making it both challenging and engaging. The structure of the clue hints at a compound word or phrase, encouraging solvers to explore different meanings of “use” and “guide.” This type of clue is popular in both standard and cryptic crosswords, as it tests linguistic agility and problem-solving skills. Understanding the clue’s wordplay is key to unlocking its solution, making it a great exercise for improving crossword techniques.

Importance of Understanding the Clue

Mastering the “Use guide, perhaps” crossword clue is essential for improving puzzle-solving skills and expanding vocabulary. This clue often appears in various crossword formats, making it a valuable challenge to conquer. Understanding its structure and possible interpretations enhances analytical thinking and wordplay recognition. The clue’s ambiguity trains solvers to think creatively, connecting seemingly unrelated words like “use” and “guide.” This skill is transferable to other crossword puzzles, aiding in deciphering similar cryptic or straightforward clues. Additionally, solving such riddles boosts confidence and sharpens linguistic agility, making it a rewarding exercise for both casual and experienced puzzlers. Grasping this clue’s nuances is a step toward becoming a more proficient crossword enthusiast.

Defining “Use Guide” in Crosswords

“Use guide” in crosswords often refers to a user guide or manual, combining “use” and “guide” to form a term related to instructional tools or methods.

Possible Meanings of “Use”

The term “use” in crosswords can have multiple interpretations. It may refer to employing something for a purpose, like using a tool or method. Additionally, “use” can imply application or utilization, such as using a guide to navigate. In some clues, “use” might suggest a homophone or wordplay, like “user” or “usher.” It can also hint at common phrases or compound words, such as “user guide” or “misuse.” The versatility of “use” allows it to fit various crossword contexts, making it a dynamic clue component. Understanding its multiple meanings is key to solving related puzzles effectively.

Interpreting “Guide” in Crossword Contexts

In crosswords, “guide” often refers to a person or tool providing direction, such as a mentor or manual. It can also imply leading or directing, like “usher” or “pilot.” Sometimes, “guide” is used metaphorically, suggesting influence or control. In cryptic clues, it might hint at wordplay, like combining “guide” with other words to form phrases. For example, “use guide” could morph into “user guide” or “usher.” The word’s flexibility makes it a popular clue element, offering both literal and abstract interpretations. Recognizing these nuances helps solvers decode crossword puzzles more efficiently and enjoy the challenge of wordplay.

Exploring Possible Answers

Exploring possible answers, the crossword clue could point to “user guide” or “usher,” both fitting the context and common solutions.

Common Solutions for “Use Guide, Perhaps”

One of the most common solutions for the crossword clue “Use guide, perhaps” is “user guide,” a straightforward combination of the words that fits well in many puzzles. Another frequently seen answer is “usher,” which can imply guiding or directing someone, aligning with the clue’s intent. These solutions are popular due to their relevance and common usage in crosswords. They effectively bridge the gap between the literal meaning of “use” and the contextual interpretation of “guide,” making them ideal fits for this type of clue.

Less Common but Relevant Answers

While “user guide” and “usher” are the most frequent answers, less common solutions exist. One such answer is “usher,” which can imply guiding someone, fitting the clue’s intent. Another option is “manual,” referring to a guide for using something. “Guidebook” is another possibility, though it’s less likely due to its length. These answers show the clue’s versatility, allowing for creative interpretations beyond the obvious. They demonstrate how crosswords often challenge solvers to think outside the box, considering both literal and metaphorical meanings. These less common answers add depth to the puzzle, making it more engaging for experienced solvers.

Understanding Crossword Clue Structure

Crossword clues like “Use guide, perhaps” often blend definition and wordplay. They may suggest direct meanings, like “user guide,” or hint at homonyms such as “usher,” adding layers of complexity to the puzzle. The structure typically includes a definition part and a wordplay part, encouraging solvers to think creatively. The word length and type of crossword, such as cryptic or standard, also influence the approach to solving the clue. This combination of literal and figurative elements makes crossword clues both challenging and engaging for solvers of all levels.

How Cryptic Clues Work

Cryptic crossword clues are cleverly constructed, using wordplay and indirect hints to lead solvers to the answer. They typically combine definition and wordplay, often involving puns, anagrams, double meanings, or homophones. The clue “Use guide, perhaps” is a classic example, where “use” might suggest employing something, while “guide” could hint at directing or leading. In cryptic clues, the wordplay often involves splitting the clue into two parts: one indicating the definition and the other the method of constructing the answer. The solver must decipher these hints to uncover the correct word or phrase. This layer of complexity makes cryptic crosswords both challenging and rewarding, requiring a blend of linguistic knowledge and creative thinking. The art lies in unraveling the subtle connections between the words.

Tips for Solving Similar Clues

When tackling cryptic clues like “Use guide, perhaps,” focus on identifying wordplay and double meanings. Consider synonyms, anagrams, and homophones. Break down the clue into its components: “use” might suggest employing something, while “guide” could imply direction or instruction. Look for common phrases that combine these concepts, such as “user guide,” which fits naturally. Pay attention to how words can serve multiple roles in a clue, and don’t hesitate to think creatively. Practice recognizing patterns and familiarize yourself with common crossword terminology to enhance your solving skills. Patience and persistence are key to mastering these clever puzzles.

The crossword clue “Use guide, perhaps” is best solved by considering wordplay and common terms. The most fitting answer is “user guide,” a widely recognized term that combines both words neatly, aligning with crossword structure and common usage.

Final Thoughts on the Clue

The crossword clue “Use guide, perhaps” is a clever example of wordplay, challenging solvers to think creatively about combining words. The most likely answer, “user guide,” blends “use” and “guide” seamlessly, reflecting common crossword strategies. This clue highlights the importance of understanding both literal and figurative meanings in crossword puzzles. By breaking down the clue into its components and considering possible interpretations, solvers can unlock even the most cryptic clues. Practice and familiarity with crossword conventions will undoubtedly improve your ability to tackle similar puzzles with confidence.

Encouragement for Further Practice

Embrace the challenge of crossword puzzles as a rewarding mental exercise. Solving clues like “Use guide, perhaps” sharpens your vocabulary, critical thinking, and problem-solving skills. Each puzzle offers a chance to discover clever wordplay and expand your knowledge. Don’t hesitate to use tools like crossword solvers or dictionaries to aid your learning. Consistent practice will enhance your ability to decode cryptic clues and recognize patterns. Celebrate small victories and enjoy the journey of improving your crossword-solving prowess. Keep practicing, and soon you’ll master even the most complex clues with ease and confidence!

first alert co detector manual

Welcome to the First Alert CO Detector Manual. This guide provides essential information for safe installation, operation, and maintenance of your carbon monoxide detector.

Reading this manual carefully ensures proper usage and maximizes safety. Understand the detector’s features, installation steps, and troubleshooting tips to protect your home and family effectively.

1.1 Overview of the First Alert CO Detector

The First Alert CO Detector is a state-of-the-art device designed to detect dangerous levels of carbon monoxide in your home. It provides early warning systems, ensuring your safety and peace of mind. With advanced features like battery backup and LED indicators, this detector is reliable and user-friendly. It is specifically engineered to alert you to the presence of CO, a colorless, odorless, and deadly gas. The detector is easy to install and maintain, making it an essential addition to any home safety system.

1.2 Importance of the Manual for Safe Installation and Use

This manual is crucial for ensuring the safe and proper installation of your First Alert CO Detector. It provides detailed instructions to maximize the device’s effectiveness and prevent false alarms. Following the guidelines helps you understand the detector’s features, such as battery maintenance and LED indicators. Proper installation and usage are vital to safeguard against carbon monoxide risks. By adhering to the manual, you can ensure your detector functions correctly, protecting your home and loved ones from potential dangers.

Understanding the Components of the First Alert CO Detector

The First Alert CO Detector includes a sensor, alarm, mounting bracket, and battery. These components work together to detect and alert you to dangerous CO levels.

2.1 Key Features of the Detector

The First Alert CO Detector boasts advanced features for reliable carbon monoxide detection. It includes a battery backup for continuous monitoring during power outages and a loud, piercing alarm to ensure alerts are heard clearly. The detector also features an LED indicator that flashes to signal the presence of CO, providing visual confirmation of potential danger. Additionally, it includes a test/silence button for easy testing and silencing of false alarms, ensuring peace of mind and efficient operation. These features enhance safety and user convenience, making it a trusted choice for home protection.

2.2 Components Included in the Package

The First Alert CO Detector package includes the detector unit itself, a mounting bracket, and necessary hardware for installation. Additionally, a detailed user manual is provided, offering step-by-step installation and operating instructions. Some models may also include a battery for initial setup. Ensure all components are accounted for before proceeding with installation to guarantee proper functioning and safety. These components are designed to make setup straightforward and ensure the detector operates effectively in detecting carbon monoxide threats.

Installation Guidelines for the First Alert CO Detector

Proper installation is crucial for the First Alert CO Detector. Choose the right location, follow the steps carefully, and test the alarm to ensure functionality and safety.

3.1 Choosing the Right Location for the Detector

Proper placement of the First Alert CO Detector is critical for accurate detection. Install detectors on every level of your home and near sleeping areas to ensure early warning.

Place detectors at least 5 feet away from fuel-burning appliances like furnaces or water heaters to avoid false alarms.

Mount the detector high on walls or on ceilings, as carbon monoxide rises. Avoid areas near windows, doors, or vents where drafts could interfere.

Install detectors in basements, garages, and near attached garages, as these areas are common sources of carbon monoxide.

3.2 Step-by-Step Installation Process

Turn off all power sources before starting the installation.

Mount the detector bracket on the wall or ceiling using screws.

Place the detector unit onto the bracket and tighten it firmly.

Restore power and test the detector by pressing the Test/Silence button.

Ensure the alarm sounds to confirm proper installation and functionality.

3.3 Mounting the Detector Bracket

Locate the optimal spot for the detector, ensuring compliance with safety guidelines.

Use the provided screws to secure the bracket to the wall or ceiling.

Ensure the surface is level and sturdy to support the detector.

Tighten the bracket firmly to prevent any movement or loosening over time.

Double-check the installation to confirm it is stable and correctly positioned.

Operating the First Alert CO Detector

Understand the LED indicators and Test/Silence button for seamless operation. Regular testing ensures functionality, while proper usage guarantees early warnings for safety. Follow manual guidelines for optimal performance.

4.1 Basic Functions and Controls

The First Alert CO Detector features a Test/Silence button for quick functionality checks and silencing false alarms. LED indicators provide visual alerts, with flashing patterns indicating CO detection or errors. A battery compartment ensures easy replacement, while the unit’s compact design allows seamless integration into any home environment. The detector operates silently under normal conditions, ensuring uninterrupted daily life. Familiarize yourself with these controls to ensure proper operation and maintain a safe living space. Regular checks and tests are crucial for optimal performance and reliability. Follow manual instructions for best results.

4.2 Testing and Silencing the Alarm

Press the Test/Silence button to check the detector’s functionality. A loud beep confirms it’s working. This button also silences false alarms. After silencing, the alarm will sound again if CO levels remain high; Always ensure the detector is functioning correctly. Regular testing is crucial for safety. Never ignore the alarm, as it indicates potential danger. Follow manual instructions for proper testing and silencing procedures. Ensuring the alarm is in good working condition is vital for protecting your home and family from carbon monoxide threats. Stay vigilant and proactive with your safety measures.

4.3 Understanding the LED Indicators

The LED indicators on your First Alert CO detector provide visual alerts and status updates. A steady red light indicates a CO alarm, while a flashing red light signals a high level of CO. A green light shows the unit is powered and functioning correctly. If the LED is off, check the battery or power connection. These indicators ensure you stay informed about the detector’s status and any potential dangers. Always monitor the LED lights to maintain safety and respond promptly to alerts.

Maintenance and Troubleshooting

Regular maintenance ensures optimal performance and safety. Clean the detector, replace batteries, and address issues promptly. Troubleshooting common problems helps prevent false alarms and potential dangers.

5.1 Cleaning and Maintaining the Detector

Regular cleaning is crucial for optimal performance. Use a soft brush or vacuum to remove dust from the detector’s exterior and vents. Avoid using chemicals or liquids, as they may damage the sensor. Check the battery compartment for corrosion and ensure it is clean. Replace batteries annually or as indicated by the manufacturer. Inspect the detector for any physical damage and test it monthly. Proper maintenance ensures reliable operation and accurate detection of carbon monoxide levels, safeguarding your home and family.

5.2 Replacing the Battery

To ensure your First Alert CO detector functions properly, replace the battery annually or when the low-battery warning sounds. Open the battery compartment located on the back or bottom of the unit. Remove the old battery and insert a new one of the recommended type, ensuring correct orientation. Close the compartment securely. Test the detector by pressing the Test/Silence button to confirm it’s working. Never ignore the low-battery alert, as it compromises your safety. Proper battery replacement ensures continuous monitoring and reliable alerts for carbon monoxide detection.

5.3 Troubleshooting Common Issues

If your First Alert CO detector malfunctioning, check for common issues. Ensure the battery is installed correctly and not expired. If the alarm sounds without CO presence, it may be a false alarm caused by dust or cooking fumes. Clean the sensor with a soft brush or vacuum. If the LED indicator flashes erratically, reset the detector by pressing and holding the Test/Silence button. For persistent problems, consult the manual or contact First Alert customer support. Regular maintenance and troubleshooting ensure reliable performance and safety.

Safety Tips and Guidelines

Never ignore the CO alarm. Ensure proper installation and maintenance. Use battery-powered detectors indoors and follow manufacturer instructions. Stay informed about CO dangers and prevention methods.

6.1 Understanding Carbon Monoxide Dangers

Carbon monoxide (CO) is a colorless, odorless, and deadly gas produced by incomplete combustion of fuels. It can emanate from faulty heating systems, generators, or improperly ventilated appliances.

Prolonged exposure to CO can cause severe health issues, including headaches, dizziness, and even death. Understanding these risks is crucial for ensuring timely evacuation and proper detector installation to safeguard your home and family from this invisible threat. Always prioritize CO safety to prevent tragic outcomes.

6.2 What to Do When the CO Alarm Sounds

If your First Alert CO detector alarms, stay calm and act quickly. Immediately evacuate everyone from the home, including pets, and move to fresh air outside.

Call emergency services or your local fire department from a safe location. Do not re-enter your home until authorities confirm it is safe. Open windows only if time permits, but do not delay evacuation; Never attempt to locate the CO source yourself, and avoid using fans or vents to dissipate the gas. Remember, ignoring the alarm can lead to severe illness or death. Always prioritize safety and follow evacuation procedures promptly.

6.3 Preventing False Alarms

To minimize false alarms, ensure your First Alert CO detector is installed correctly and maintained regularly. Test the alarm monthly and clean the detector to remove dust or debris that may trigger false alerts.

Avoid installing the detector near cooking appliances, as small amounts of CO from normal household activities can cause false alarms. Ensure proper ventilation in areas like garages or near fuel-burning appliances. Always use a battery-powered or battery-backup CO alarm and replace batteries as needed to prevent low-battery chirps, which can be mistaken for an actual alarm. Regular maintenance helps ensure reliable performance and reduces unnecessary disruptions.

Accessing Additional Resources

For more detailed instructions or support, visit the First Alert website at www.firstalert.com. Download the full manual or contact customer support for assistance.

Call 1-800-323-9005 for help with your First Alert CO detector. Additional resources include troubleshooting guides and FAQs to ensure optimal performance and safety.

7.1Downloading the Full Manual

7.1 Downloading the Full Manual

To access the complete manual for your First Alert CO detector, visit the official First Alert website at www.firstalert.com.

Navigate to the “Support” section, locate your specific model, and download the PDF manual. This resource provides detailed instructions, troubleshooting tips, and safety guidelines.

Ensure you have the correct model number, such as CO400, for accurate information. The manual is available free of charge and is essential for proper installation and operation.

Refer to it for comprehensive guidance on maintaining your detector and understanding its features for optimal safety and performance.

7.2 Contacting First Alert Customer Support

For assistance with your First Alert CO detector, contact customer support at 1-800-323-9005. This service is available to address installation, troubleshooting, or general inquiries.

Visit the official website at www.firstalert.com for additional resources, including FAQs and product-specific guidance. Representatives are ready to help ensure your detector functions properly and safely.

Reach out if you need a replacement manual, technical advice, or clarification on any features. Prompt support is crucial for maintaining your safety and the effectiveness of your CO alarm.

The First Alert CO Detector Manual ensures safe and effective use of your carbon monoxide alarm, promoting household safety and peace of mind through proper installation and maintenance.

8.1 Final Thoughts on Safe Usage

Always adhere to the manual’s guidelines for optimal performance and safety; Regularly test your First Alert CO detector and ensure proper installation. Understand that carbon monoxide is odorless and invisible, making your detector a vital life-saving device. Never ignore the alarm; if it sounds, evacuate immediately and call emergency services. By following these steps, you ensure the safety of your household and gain peace of mind.

bosch oven user guide

Welcome to the Bosch Oven User Guide! This guide provides essential information for safe and efficient operation, helping you unlock your oven’s full potential. Explore features, maintenance tips, and troubleshooting solutions to enhance your cooking experience and master your appliance.

Overview of Bosch Oven Features

Bosch ovens are designed to offer a seamless and efficient cooking experience. They feature advanced functions like AutoPilot, which simplifies cooking specific dishes by pre-programming settings. Multiple cooking modes, including conventional, convection, and grill options, provide versatility. The user-friendly touch control panel allows easy navigation, while smart connectivity enables integration with home networks for remote monitoring. Safety features such as child safety locks and automatic shut-off enhance security. Energy efficiency is prioritized with eco-friendly modes, reducing power consumption. Durable materials and sleek designs ensure longevity and aesthetic appeal. These features make Bosch ovens a versatile and reliable choice for modern kitchens, catering to diverse cooking needs.

Importance of Reading the User Manual

Reading the Bosch Oven user manual is essential for safe and optimal use. It provides crucial safety guidelines, such as fire prevention tips and proper cleaning procedures, to avoid hazards. The manual outlines features like AutoPilot and advanced cooking modes, ensuring you maximize your oven’s capabilities. It also covers maintenance tips, like cleaning before first use and regular care, to prolong the appliance’s lifespan. Troubleshooting sections help resolve common issues independently, saving time and effort. Understanding warranty details and customer support options is also vital. By following the manual, you ensure efficient, safe, and enjoyable cooking experiences while protecting your investment in the Bosch Oven.

Safety Precautions and Basic Maintenance

Ensure the oven is switched off before cleaning, and avoid harsh chemicals. Regularly remove food residues to prevent fires and maintain performance; Always refer to the manual for detailed maintenance instructions.

Fire Safety Guidelines

To ensure safe operation, always follow fire safety guidelines. Keep the oven clean, as food remnants can ignite. Never leave cooking unattended, especially at high temperatures. If a fire occurs, switch off the oven and unplug it if possible. Close the oven door to starve the flames of oxygen. Never use water to extinguish grease fires. Keep a fire extinguisher nearby and ensure it’s easily accessible. Avoid wearing loose clothing near the oven to prevent accidental ignition. Regularly inspect heating elements for damage. Follow these precautions to maintain a safe cooking environment and prevent potential hazards. Always refer to the manual for detailed safety instructions.

Cleaning the Oven Before First Use

Before using your Bosch oven for the first time, clean it thoroughly to remove any manufacturing residues. Wipe the interior with a clean, damp cloth and a mild dish detergent. Avoid harsh chemicals or abrasive cleaners, as they may damage the surfaces. After cleaning, dry the oven thoroughly with a soft cloth. To reduce any first-use odor, run a 30-minute bake cycle at 350°F (175°C). This step ensures the oven is ready for cooking and free from any unwanted smells. Properly cleaning and preparing your oven before first use guarantees optimal performance and a fresh cooking environment for years to come.

Operating the Bosch Oven

Set the desired temperature using the dial and timer function for precise control. Use pre-programmed AutoPilot settings for effortless cooking; Explore advanced features for enhanced culinary results.

Setting Temperature and Timer

To set the temperature, use the control dial to select your desired heat level in 10°F or 5°C increments. For the timer, utilize the dedicated buttons or timer function to input cooking duration. Press start to begin the cycle. Ensure the oven preheats before placing food inside for optimal results. Always double-check your settings before starting to avoid errors. Proper temperature and timing ensure perfectly cooked dishes every time. This feature is essential for achieving consistent cooking outcomes with your Bosch oven.

Using Advanced Cooking Features

Your Bosch oven offers advanced cooking features designed to simplify and enhance your culinary experience. The AutoPilot function allows you to select pre-programmed settings for specific dishes, ensuring precise temperature and cooking times. Sensors automatically adjust heat and duration for optimal results. Explore steam cooking for healthier meals, and use smart connectivity to control your oven via a mobile app. Additional features like eco-mode reduce energy consumption while maintaining performance. These advanced options make cooking easier and more efficient, allowing you to achieve professional-grade results with minimal effort. Familiarize yourself with these features to unlock your oven’s full potential and elevate your cooking skills.

Maintenance and Troubleshooting

Regularly clean your Bosch oven to maintain performance and safety. Troubleshooting common issues like error codes or faulty sensors can often resolve problems without professional help. Always refer to your user manual for specific guidance and solutions to ensure your oven operates efficiently and effectively. Proper care extends the appliance’s lifespan and prevents malfunctions, keeping your kitchen running smoothly.

Regular Cleaning and Care Tips

Regular cleaning is essential to maintain your Bosch oven’s performance and hygiene. Before first use, wipe the interior with a damp cloth and mild detergent, then dry thoroughly. For routine maintenance, clean food residues promptly to prevent buildup. Use Bosch-approved cleaning products or a mixture of water and baking soda for gentle yet effective cleaning. Avoid abrasive materials that could scratch surfaces. Run a cleaning cycle or a 30-minute bake at 350°F to reduce odors. Always unplug the oven before deep cleaning. Regular care ensures optimal cooking results and prolongs the appliance’s lifespan; Keep your oven in pristine condition for years of reliable service.

Common Issues and Solutions

Troubleshooting your Bosch oven can be straightforward with the right approach. A non-responsive touch panel may require resetting the appliance by unplugging it for 30 seconds. If the oven door won’t unlock, ensure it has fully cooled down. For issues like uneven heating, check if the racks are correctly positioned and the oven is preheated properly. Error codes often indicate specific problems, so refer to your user manual for interpretations. Regular cleaning can prevent grease buildup, which might cause malfunctions. If problems persist, contact Bosch customer support or a certified technician for assistance. Timely solutions ensure your oven operates efficiently and safely.

Understanding the User Interface

Your Bosch oven features an intuitive interface designed for easy navigation. The control panel includes a clear LCD display, temperature controls, and function buttons for seamless operation and customization.

Navigating the Control Panel

Navigating the Bosch oven’s control panel is straightforward. Start by selecting the desired cooking mode using the function buttons. Adjust temperature and timer settings with the dial or numeric keypad. The LCD display clearly shows your selections, ensuring precise control. For advanced features, use the touch-sensitive buttons to access options like AutoPilot or smart home integration. The interface is designed to be user-friendly, allowing you to customize settings and monitor cooking progress effortlessly. Familiarize yourself with the layout to make the most of your oven’s capabilities and enjoy a seamless cooking experience every time.

Customizing User Settings

Customizing your Bosch oven’s settings enhances your cooking experience. Access the settings menu via the control panel to adjust language, display brightness, and unit preferences. Select from Celsius or Fahrenheit for temperature readings. You can also program favorite cooking modes or preset temperatures for frequently used recipes. For models with smart connectivity, sync your preferences across devices. Refer to the user manual for detailed steps on accessing and modifying these settings. Personalizing your oven ensures it adapts to your culinary needs, making cooking more intuitive and enjoyable. Explore these options to tailor your appliance to your lifestyle and preferences for optimal performance.

Accessing Additional Resources

For further assistance, visit the Bosch website to download user manuals, installation guides, and troubleshooting tips. Contact customer support for personalized help or repairs. Explore FAQs and expert advice online to maximize your oven’s performance and address any queries promptly.

Downloading Bosch Oven Manuals

To access detailed instructions and guidance for your Bosch oven, visit the official Bosch website. Navigate to the support section and enter your oven’s model number (E-Nr.) to download the specific user manual. These manuals are available in PDF format, making them easy to save and print. Additionally, you can find installation guides, troubleshooting tips, and technical specifications. For further assistance, Bosch customer support is available via phone, email, or live chat. Ensure you have your model number ready for quicker service. Downloading the manual is a convenient way to explore your oven’s features, maintenance tips, and error-solving solutions anytime, anywhere.

Contacting Customer Support

For any questions or issues with your Bosch oven, reaching out to customer support is straightforward. Visit the official Bosch website and navigate to the contact section. You can call their toll-free number at (800) 944-2904 for immediate assistance or utilize the live chat feature. Additionally, fill out the contact form on their website to receive a prompt response. Bosch also offers an optional one-minute survey to improve their services. Remember to have your oven’s model number (E-Nr.) ready to expedite support. Whether troubleshooting, requesting repair, or seeking expert advice, Bosch’s dedicated team is available to ensure your appliance performs optimally. Their support options provide quick solutions to enhance your cooking experience.

dewalt 1600 jump starter manual

The DeWalt 1600 Jump Starter is a powerful, portable solution for vehicles, combining 1600 peak amps with a digital air compressor and USB charging ports for convenience.

Overview of the Product

The DeWalt 1600 Jump Starter is a versatile, high-performance tool designed for jump-starting vehicles and inflating tires. It features 1600 peak amps, a digital air compressor with AUTOSTOP, and dual USB ports for charging devices. Built with a portable design and an integrated light, it’s ideal for emergency situations. The unit also includes safety features and a lithium battery for reliable power on the go, making it a must-have for car owners and outdoor enthusiasts.

Importance of the Manual

The manual is essential for safe and effective use of the DeWalt 1600 Jump Starter. It provides detailed instructions, safety guidelines, and troubleshooting tips, ensuring users understand proper operation. Reading it helps prevent accidents, optimizes performance, and prolongs the product’s lifespan. The manual also outlines warranty information and maintenance tips, making it a crucial resource for owners to maximize the tool’s benefits and ensure longevity.

Key Features of the DeWalt 1600 Jump Starter

The DeWalt 1600 Jump Starter offers 1600 peak amps, a 120 PSI digital air compressor, USB-A and USB-C charging ports, and a portable design with a built-in light.

Peak Amps and Jump-Starting Capacity

The DeWalt 1600 Jump Starter delivers 1600 peak amps, providing reliable jump-starting power for vehicles with up to 8-liter gas or 6-liter diesel engines. Its robust capacity ensures quick starts even in cold conditions, making it ideal for cars, trucks, and SUVs. This high-performance capability is essential for emergency situations, ensuring drivers can get back on the road without delay or professional assistance.

Digital Air Compressor with AUTOSTOP

The DeWalt 1600 features a 120 PSI digital air compressor equipped with AUTOSTOP technology, automatically shutting off when the desired pressure is reached. This prevents over-inflation and ensures safety. The SureFit nozzle provides a secure connection to tires, while the digital display offers precise pressure control. Ideal for inflating tires, sports equipment, and more, this compressor combines efficiency with ease of use, enhancing versatility for various applications. Its compact design adds portability, making it a practical accessory for any vehicle owner.

USB Charging Ports (USB-A and USB-C)

The DeWalt 1600 includes dual USB ports, USB-A and USB-C, offering convenient charging for smartphones, tablets, and other devices. With fast-charging capabilities, these ports ensure your devices stay powered on the go. The USB-C port supports higher power delivery, making it ideal for charging modern electronics efficiently. This feature adds versatility, allowing the jump starter to function as a portable power bank, enhancing its utility beyond jump-starting vehicles. This ensures you stay connected and productive anywhere.

Portable Design and Built-in Light

The DeWalt 1600 features a compact, lightweight design for easy transport, making it ideal for emergency roadside use. Equipped with a built-in LED light, it illuminates work areas in low-light conditions, enhancing visibility and safety. This design ensures the jump starter is both portable and practical, catering to various scenarios, from vehicle emergencies to outdoor activities. Its portability and lighting functionality make it a versatile tool for everyday and unexpected situations.

Safety Instructions for Proper Use

Always ensure the work area is clean and well-lit to prevent accidents. Avoid operating in explosive atmospheres and follow all electrical safety guidelines to ensure safe usage.

General Safety Precautions

Keep the work area clean and well-lit to minimize accident risks. Avoid operating in explosive atmospheres and ensure proper ventilation. Always read the manual before use and follow all guidelines to ensure safe operation. Never use abrasive cut-off wheels on mitre saws, as they are designed for cutting wood. Adhere to all safety instructions to prevent accidents and ensure optimal performance of the DeWalt 1600 Jump Starter.

Work Area Safety Tips

Ensure your work area is clean, well-lit, and free from clutter to reduce accident risks. Avoid operating the jump starter in explosive or flammable environments. Keep the area well-ventilated, especially when using the air compressor. Ensure the surface is stable and level to prevent the device from tipping. Keep flammable materials away when inflating tires or charging. Secure loose clothing and tie back long hair to avoid entanglement with moving parts.

Electrical Safety Guidelines

  • Always follow proper charging procedures to avoid electrical hazards.
  • Never modify or tamper with the jump starter’s electrical components.
  • Ensure the device is used in dry conditions to prevent short circuits.
  • Avoid using damaged cables or connectors to minimize shock risks.
  • Keep the jump starter away from water and moisture.
  • Use only the provided chargers and adapters for safe operation.

Technical Specifications of the DeWalt 1600

The DeWalt 1600 features 1600 peak amps, a 120 PSI digital compressor, and USB-A/USB-C ports for charging, designed for reliable performance and versatility in various applications.

Peak Current and Battery Capacity

The DeWalt 1600 delivers 1600 peak amps, ensuring strong jump-starting power for cars and trucks. Its lithium battery provides reliable energy storage, supporting multiple jumps on a single charge. The unit also features dual USB ports for charging devices, making it a versatile emergency power source. Designed for durability, the battery maintains performance across various temperatures, ensuring consistent reliability in different conditions.

Charging Capabilities

The DeWalt 1600 supports multiple charging options, including a home AC charger, car DC charger, and USB charging cable. This versatility allows users to recharge the lithium battery from various power sources, ensuring convenience on the go. The battery’s advanced charging system optimizes energy intake, minimizing charge times while maximizing performance and longevity. This feature makes it ideal for emergency use in different environments.

Compressor Features (PSI, AUTOSTOP, SureFit Nozzle)

The DeWalt 1600 features a 120 PSI digital air compressor with AUTOSTOP technology, automatically shutting off when the desired pressure is reached. The SureFit nozzle ensures a secure, leak-free connection to tires, while the digital display provides precise pressure monitoring. This combination enhances efficiency, safety, and ease of use for inflating tires and other inflatables, making it a versatile tool for various applications.

How to Use the Jump Starter Effectively

Connect the clamps correctly to the battery terminals, ensuring polarity is right to avoid sparks. Start the engine and monitor connections for proper operation and safety.

Step-by-Step Jump-Starting Process

Ensure the vehicle is turned off and in park. Locate the battery and attach clamps securely to terminals, red to positive and black to negative. 2. Turn on the jump starter and let it power the vehicle. 3. Start the engine and remove clamps in reverse order. 4. Recharge the unit if necessary. Always follow safety guidelines to avoid sparks or electrical hazards during the process.

Using the Digital Air Compressor

Turn on the compressor and set the desired pressure using the digital display. 2. Attach the SureFit nozzle to the tire valve stem for a secure connection. 3. Monitor the pressure gauge to avoid over-inflation. 4. The AUTOSTOP feature will automatically shut off the compressor when the set pressure is reached. 5. Turn off the compressor and release any remaining pressure before detaching the nozzle.

Charging the Battery

Use the provided AC or DC charger to charge the battery. 2. Plug the charger into a power source and connect it to the jump starter. 3. Charge in a well-ventilated area, away from flammable materials. 4. Monitor the charge level using the built-in indicator. 5. Avoid overcharging by disconnecting once the battery is fully charged. 6. Store the charger and cable securely after use.

Battery Maintenance and Care

Regularly inspect the battery for signs of wear or damage. Avoid extreme temperatures and overcharging. Store in a dry, cool place when not in use.

Best Practices for Charging

Charge the battery using the provided AC or DC charger. Avoid overcharging by stopping once the indicator shows full charge. Store the unit in a cool, dry place after charging. Always monitor charge levels and follow the manual’s guidelines for optimal performance and longevity of the battery.

Storage Recommendations

Store the DeWalt 1600 Jump Starter in a cool, dry place away from direct sunlight and moisture. Keep it away from flammable materials and avoid extreme temperatures. Ensure the battery is charged to at least 50% before storage to prevent deep discharge. Regularly check the battery level during storage and charge as needed to maintain health and performance. Always follow the manual’s guidelines for proper storage.

Signs of Battery Wear

Look for signs like reduced jump-starting power, longer charging times, and battery swelling. If the unit takes longer to charge or doesn’t hold a charge well, it may indicate wear. Additionally, if the battery drains quickly or the jump starter’s performance diminishes over time, it’s a sign that the battery needs attention or replacement. Always refer to the manual for specific guidelines on assessing battery health.

Digital Air Compressor Operation

The DeWalt 1600 features a 120 PSI digital air compressor with AUTOSTOP for safe, efficient tire inflation. Use the SureFit nozzle for secure connections and precise control.

Understanding AUTOSTOP Functionality

The AUTOSTOP feature automatically shuts off the compressor when the desired pressure is reached, preventing over-inflation. This enhances safety and prolongs tire life by maintaining precise control during inflation tasks.

Using the SureFit Nozzle

The SureFit nozzle is designed for easy, leak-free connections to tire valves. Align the nozzle with the valve stem, press firmly, and hold until inflation begins. Its secure fit ensures efficient airflow, reducing wasted effort. After use, store the nozzle securely to avoid damage. This feature simplifies tire inflation, making it quicker and more straightforward for users of the DeWalt 1600 Jump Starter.

Tire Inflation Guidelines

Always check tire pressure before inflation, using the vehicle’s recommended PSI. Attach the SureFit nozzle securely to the valve stem. Turn on the compressor and monitor pressure via the digital display. The AUTOSTOP feature prevents over-inflation by shutting off automatically. Inflate tires in a well-ventilated area, away from direct sunlight, to ensure accurate pressure readings and safe operation with the DeWalt 1600 Jump Starter.

Troubleshooting Common Issues

  • If the battery won’t charge, ensure connections are secure and try a different outlet.
  • For compressor issues, check for blockages and ensure the AUTOSTOP feature isn’t engaged.
  • If USB ports malfunction, try using original cables or resetting the device.

Diagnosing Battery Problems

To diagnose battery issues with your DeWalt 1600 Jump Starter, start by checking the charge level using the built-in display. Ensure all connections are clean and secure. If the battery won’t hold a charge, inspect for signs of wear or damage. Slow engine cranking or dim lights indicate a weak battery. Refer to the manual for detailed troubleshooting steps and charging guidelines to restore functionality.

Compressor Malfunction Solutions

If the compressor fails to turn on, ensure the power button is functioning and connections are secure. Check for blockages in the SureFit nozzle and verify tire pressure matches the recommended level. If the compressor runs but doesn’t reach desired PSI, inspect the AUTOSTOP feature and ensure it’s not engagement prematurely. Consult the manual for reset procedures or contact DeWalt support for further assistance if issues persist.

USB Port Troubleshooting

If the USB ports are not functioning, ensure the jump starter is fully charged and powered on. Try using a different USB cable or device to rule out cable damage. Clean the ports gently with a soft cloth to remove debris. If issues persist, reset the unit by turning it off and on. Contact DeWalt customer support for further assistance or potential repairs if the problem continues;

Warranty and Customer Support

DeWalt provides a limited warranty for the 1600 Jump Starter, covering manufacturing defects. Register your product for extended support. Contact customer service via phone, email, or the official website for inquiries and repairs.

DeWalt Warranty Coverage

DeWalt offers a limited warranty for the 1600 Jump Starter, covering defects in materials and workmanship. The warranty period varies by component, with the lithium-ion battery typically covered for 3 years. Proper registration and adherence to usage guidelines are required for warranty validation. Repairs or replacements are provided at no cost during the warranty period. Visit the official DeWalt website for detailed terms and conditions.

Contacting Customer Service

For assistance with the DeWalt 1600 Jump Starter, visit the official DeWalt website to access contact information. Phone support is available for immediate inquiries, while email support provides detailed assistance. Additionally, the website offers a “Contact Us” section with regional offices listed for location-specific support. Ensure to have your model number and serial number ready for efficient service. DeWalt’s customer service team is available to address any questions or concerns.

The DeWalt 1600 Jump Starter is a reliable, versatile tool for vehicle emergencies and inflation needs, backed by DeWalt’s trusted quality and customer support.

Final Thoughts on the DeWalt 1600

The DeWalt 1600 Jump Starter is a robust, multi-functional device designed for vehicle emergencies, offering 1600 peak amps, a digital compressor, and USB ports. Its portability and built-in light enhance usability. Safety features and detailed instructions ensure reliable performance. With DeWalt’s reputation for quality, this tool is an excellent choice for drivers seeking a dependable emergency solution.

manual safety

Manual safety involves practices and procedures to minimize risks associated with lifting‚ pushing‚ and pulling. It focuses on preventing injuries and ensuring a safe working environment. Proper techniques‚ risk assessments‚ and employee training are key components to reducing workplace hazards effectively.

Key Principles of Manual Safety

Manual safety revolves around assessing tasks‚ planning lifts‚ using proper techniques‚ staying within personal limits‚ and maintaining physical fitness to prevent injuries and ensure safe practices.

Assess the Task

Assessing the task is the first step in manual safety‚ involving evaluating the load‚ environment‚ and personal capabilities. Check the weight‚ balance‚ and size of the object‚ ensuring it can be safely handled. Consider the path for moving the load‚ removing obstacles to prevent tripping or collisions. Evaluate your physical condition and strength relative to the task. Use risk assessments to identify potential hazards‚ such as uneven surfaces or awkward postures. Involve colleagues if the task is too demanding. Proper assessment helps prevent injuries‚ reduces physical strain‚ and ensures compliance with safety regulations. It also minimizes legal risks and promotes a culture of safety in the workplace.

Plan the Lift

Planning the lift is crucial for manual safety‚ ensuring the task is executed safely and efficiently. Start by deciding how to approach the lift‚ considering the object’s weight‚ size‚ and shape. Walk the route beforehand to identify obstacles and ensure a clear path. Determine whether mechanical aids‚ like trolleys or pulleys‚ are needed to reduce physical strain. If the load is too heavy or awkward‚ involve colleagues to share the effort. Communicate clearly with your team to coordinate movements‚ especially in group lifts; Proper planning minimizes risks‚ prevents accidents‚ and ensures the task is completed without injury. It also helps in maintaining compliance with workplace safety standards and regulations.

Use Proper Lifting Techniques

Proper lifting techniques are essential to prevent injuries and ensure manual safety. Always bend at the knees‚ maintaining a straight back to lift objects. Keep the load close to your body to minimize strain on your muscles. Avoid twisting while lifting‚ as this can lead to spinal injuries. Use two hands to lift or carry objects for better control and balance. If the object is too heavy or awkward‚ consider using mechanical aids like trolleys or pulleys. Proper posture and lifting methods help reduce the risk of workplace accidents. Regular training and practice of these techniques ensure they become second nature‚ promoting a safer and more efficient working environment. Stay fit and healthy to handle manual tasks effectively.

Know Your Limits

Knowing your physical limits is crucial for manual safety. Assess your strength‚ stamina‚ and ability to handle specific tasks without risking injury. Avoid lifting objects that exceed your capacity or require excessive strain. Recognize when a load is too heavy or awkward and seek assistance or mechanical aids. Understanding your limitations ensures you can perform tasks safely and efficiently. Regularly evaluate your fitness level and adjust your approach to manual handling accordingly. This self-awareness helps prevent overexertion and reduces the likelihood of workplace accidents. Always prioritize your health and safety by staying within your capabilities and seeking help when needed.

Stay Fit and Healthy

Staying physically fit and healthy is essential for manual safety. Regular exercise‚ such as core strengthening and flexibility workouts‚ improves posture and reduces injury risks. A healthy lifestyle‚ including a balanced diet and adequate rest‚ enhances overall physical resilience. Employers often encourage wellness programs to promote employee fitness‚ which directly benefits manual handling tasks. Maintaining a healthy weight and avoiding harmful habits‚ such as smoking or excessive alcohol‚ further supports physical capability. By prioritizing fitness‚ individuals can perform manual tasks more safely and efficiently‚ reducing the likelihood of strain or injury. Regular health check-ups and proactive health management are also key to sustaining long-term physical well-being.

Safety Practices for Manual Handling

Essential practices include assessing loads‚ using mechanical aids‚ maintaining proper posture‚ and avoiding hazardous movements. These strategies reduce injury risks and ensure tasks are performed safely and efficiently.

Proper Lifting Techniques

Proper lifting techniques are crucial to prevent injuries and ensure safe manual handling. Start by assessing the load‚ plan your lift‚ and maintain a stable position. Bend at the knees‚ keep the object close to your body‚ and avoid twisting. Use both hands to grasp the load firmly‚ and lift with your leg muscles rather than your back. Keep the object at waist height and avoid lifting above shoulder level if possible. Move smoothly and avoid sudden jerks. If the load is too heavy‚ consider using mechanical aids or seeking assistance. Regular training and practice help reinforce these techniques and reduce workplace hazards effectively.

Use of Mechanical Aids

Using mechanical aids is an essential part of manual safety‚ reducing physical strain and preventing injuries. Tools like pallet jacks‚ trolleys‚ and hoists can simplify tasks involving heavy or bulky loads. These aids minimize the need for excessive lifting‚ bending‚ or twisting‚ which are common causes of workplace injuries. Employers should assess tasks to determine when mechanical aids are necessary and ensure they are readily available. Employees must be trained to use these devices correctly to maximize their effectiveness. Regular maintenance of mechanical aids is also crucial to ensure they function safely and efficiently. By incorporating mechanical aids into workflows‚ organizations can significantly reduce the risks associated with manual handling tasks.

Maintaining Proper Posture

Maintaining proper posture is crucial for manual safety‚ as it reduces the risk of injury during lifting and carrying tasks. Bend at the knees‚ keep your back straight‚ and hold the load close to your body to minimize strain. Avoid twisting or overreaching‚ as these movements can lead to muscle strain or spinal injury. Proper posture ensures that the body’s muscles are used efficiently‚ distributing the weight evenly and reducing fatigue. Employers should provide training on correct postural techniques‚ and employees should practice these methods consistently. Regular breaks and stretching can also help maintain proper posture and overall physical well-being during manual handling tasks.

Avoiding Hazardous Movements

Avoiding hazardous movements is essential to prevent injuries during manual handling. Actions such as twisting‚ stooping‚ or overreaching can strain muscles and joints‚ leading to harm. To minimize risks‚ maintain a stable stance and turn with your feet instead of twisting your torso. Keep the load close to your body to reduce the need for stretching or reaching. Additionally‚ avoid sudden jerks or abrupt movements‚ as they can cause loss of control or imbalance. Employers should train employees to recognize and avoid such hazardous movements‚ while employees should stay mindful of their body positioning and movement patterns during tasks. Regular safety drills and reminders can reinforce these practices and promote a safer work environment.

Legal Responsibilities and Regulations

Employers must conduct risk assessments‚ provide safe procedures‚ and ensure compliance with manual handling regulations. Employees must follow guidelines and report hazards‚ while regulations enforce accountability for workplace safety.

Employer Duties

Employers are legally required to ensure a safe working environment by conducting risk assessments and implementing safe manual handling procedures. They must provide training‚ supervision‚ and necessary equipment to prevent injuries. Employers should also maintain records of safety practices and ensure compliance with regulations like the Management of Health and Safety at Work Regulations. Regular monitoring of workplace conditions and employee well-being is essential to mitigate hazards. Employers must take corrective actions if risks are identified‚ ensuring all tasks are performed safely. Failure to meet these duties can result in legal consequences‚ emphasizing the importance of proactive management in safeguarding employee health and safety.

Employee Responsibilities

Employees play a crucial role in maintaining manual safety by following established guidelines and practices. They must assess tasks‚ use proper lifting techniques‚ and avoid hazardous movements. Employees should report any risks or unsafe conditions to their employers promptly. Participating in training sessions and adhering to safety instructions is essential. Staying physically fit and avoiding unnecessary strain during manual tasks are also key responsibilities. Employees must ensure they understand and follow all safety protocols‚ as their active involvement significantly reduces workplace injuries. By taking personal responsibility for their actions‚ employees contribute to a safer and healthier work environment for everyone.

Compliance with Safety Regulations

Compliance with safety regulations is essential to ensure a safe working environment and minimize risks associated with manual handling. Employers and employees must adhere to legal requirements‚ such as the Management of Health and Safety at Work Regulations‚ which mandate risk assessments and appropriate safety measures. Regular audits and inspections should be conducted to verify adherence to these standards. Proper documentation of safety practices and training records is also required. Non-compliance can result in legal penalties and increased workplace hazards. By following established regulations‚ organizations can create a culture of safety‚ reduce injuries‚ and promote a healthy workforce. Compliance ensures that all manual handling tasks are performed safely and efficiently.

Training and Education in Manual Safety

Effective training and education are critical for reducing manual handling risks. Employers must provide regular‚ job-specific instruction to ensure employees understand safe practices and procedures‚ promoting a safer workplace.

Essential Training Topics

Essential training topics in manual safety include understanding the risks of manual handling‚ proper lifting techniques‚ and the use of mechanical aids. Employees should learn how to assess tasks‚ plan lifts‚ and maintain proper posture to avoid injuries. Training also covers recognizing personal limits and the importance of staying physically fit. Additionally‚ sessions should address avoiding hazardous movements‚ such as bending and twisting‚ and emphasize the importance of regular training participation. These topics ensure workers can perform tasks safely and efficiently‚ reducing the likelihood of workplace accidents and promoting a culture of safety.

Role of Supervisors in Safety

Supervisors play a crucial role in promoting manual safety by ensuring safe work practices are followed. They are responsible for providing proper training‚ monitoring compliance with safety protocols‚ and addressing potential risks. Supervisors should lead by example‚ demonstrating correct lifting techniques and encouraging employees to report unsafe conditions. They also conduct regular risk assessments and ensure that mechanical aids are available when needed. Additionally‚ supervisors are key in fostering a safety-first culture‚ promoting regular training‚ and ensuring employees understand their responsibilities. Their proactive approach helps prevent injuries and maintains a safe working environment‚ acting as a bridge between management and employees in safety matters.

ls wiring harness instructions

Installing an LS wiring harness is crucial for a successful engine swap. This guide provides detailed steps for LS wiring harness installation, troubleshooting, and system integration, ensuring a seamless setup for your vehicle.

Tools and Materials Needed for LS Wiring Harness Installation

Essential tools include a wiring diagram, multimeter, and hand tools. Materials needed are heat shrink tubing, connectors, and zip ties for a secure and professional installation.

Essential Tools for Wiring Harness Installation

For a successful LS wiring harness installation, gather essential tools to ensure accuracy and efficiency. A wiring diagram is crucial for identifying connectors and wire functions. A multimeter is necessary for testing voltage and continuity. Basic hand tools like pliers, screwdrivers, and wrenches are required for connector removal and installation. Heat shrink tubing and a heat gun are needed for insulating and protecting connections. Wire strippers and crimpers are essential for modifying or repairing wires. A soldering iron can be useful for permanent connections. Zip ties and adhesive-backed clips will help organize and secure the harness. A torque wrench may be needed for specific sensor installations. Lastly, a clean, well-lit workspace and a helper can make the process smoother. These tools will help you navigate the complexities of wiring harness installation effectively.

Required Materials for a Successful LS Swap

A successful LS swap requires specific materials to ensure compatibility and functionality. A standalone wiring harness is essential, designed for your LS engine type (e.g., LS1, LS2, LS3). An Engine Control Module (ECM) or Powertrain Control Module (PCM) is necessary to manage engine operations. A Transmission Control Module (TCM) may be needed if using an automatic transmission. Fuel injectors, spark plugs, and oxygen sensors must be compatible with your LS engine. A fuel pump and fuel lines suitable for high pressure are required. Mounting brackets for the ECM and engine accessories are crucial. Wiring connectors and adapters may be needed for integration with your vehicle’s electrical system. A high-capacity alternator and battery ensure reliable power supply. Additionally, a MAF sensor and intake manifold compatible with your LS engine are essential. These components ensure a smooth and functional LS swap, addressing both engine and electrical system requirements.

Understanding the Anatomy of an LS Wiring Harness

An LS wiring harness consists of key components like the ECM, sensors, and connectors; It’s designed to integrate seamlessly with your vehicle’s electrical system, ensuring proper engine function and communication.

Identifying Key Connectors and Components

When working with an LS wiring harness, it’s essential to identify key connectors and components. The Engine Control Module (ECM) is the brain of the system, controlling fuel injection, ignition timing, and more. Sensors such as the Mass Airflow Sensor (MAF), Throttle Position Sensor (TPS), and Oxygen Sensors are critical for accurate engine performance. Connectors like the main engine harness connector and transmission connector ensure proper communication between components. Familiarizing yourself with these parts helps in troubleshooting and installation. Proper labeling and organization are recommended to avoid confusion during the process. Ensuring all connectors are securely attached and free from corrosion is vital for reliable operation. This step lays the foundation for a successful LS swap, allowing your vehicle to function efficiently and maintain optimal performance;

Decoding Wire Colors and Their Functions

Understanding the color coding of wires in an LS wiring harness is crucial for proper installation and troubleshooting. Each color corresponds to a specific function, ensuring accurate connections. For example, yellow wires often represent battery power, while pink wires may indicate ignition-related circuits. Fuel injector wires are typically blue, and oxygen sensor wires are usually gray or white. Ground wires are commonly black or brown. Using a wiring diagram specific to your LS engine is essential for decoding these colors accurately. This ensures that sensors, actuators, and electronic components are connected correctly. Proper identification prevents electrical issues and ensures the engine runs smoothly. By referencing the wiring diagram and using tools like a multimeter, you can verify connections and diagnose faults efficiently. This step is vital for a successful LS swap, as incorrect wiring can lead to poor performance or engine failure.

Preparing the Engine Bay for Wiring Harness Installation

Properly preparing the engine bay ensures a smooth LS wiring harness installation. Clean and organize the area, remove unnecessary components, and inspect existing wiring. Mounting the ECM and associated components securely is essential for optimal performance and reliability. Ensure all connections are accessible and properly grounded.

Cleaning and Organizing the Engine Bay

Cleaning and organizing the engine bay is a critical first step in any LS wiring harness installation. Start by removing dirt, grime, and old wiring to ensure a clean workspace. This prevents damage to the new harness and ensures proper connections. Use protective coverings for sensitive components to avoid contamination. Organize existing wires and components, labeling them for clarity. A well-prepared engine bay not only simplifies the installation process but also reduces the risk of electrical issues down the line. Take the time to inspect for any rust or corrosion and address these issues before proceeding. A clean and organized engine bay will make the installation of your LS wiring harness much smoother and less prone to complications.

  • Remove dirt and debris thoroughly.
  • Protect sensitive components with coverings.
  • Label and organize existing wiring.
  • Inspect for rust or corrosion and address it.

By doing this, you’ll create a clean, efficient workspace for your LS wiring harness installation.

Mounting the ECM and Associated Components

Mounting the Engine Control Module (ECM) and its associated components is a vital step in the LS wiring harness installation. Begin by selecting a suitable location for the ECM, ensuring it is protected from heat sources like the exhaust manifold or radiator. Secure the ECM using the provided mounting bracket or a compatible alternative, ensuring it is firmly attached to prevent vibration damage. Next, connect the ECM to the wiring harness, making sure all connectors are properly seated and secured. Additionally, install any associated components such as the throttle pedal, oxygen sensor, and coolant temperature sensor, following the manufacturer’s guidelines. Proper grounding of the ECM is essential to prevent electrical interference and ensure accurate sensor readings. Finally, route the wiring harness neatly, avoiding any sharp bends or pinch points, and secure it with zip ties or clips. A well-mounted ECM and neatly organized wiring harness will ensure reliable performance and simplify future maintenance.

  • Choose a heat-protected location for the ECM.
  • Secure the ECM firmly to prevent vibration.
  • Connect all components according to manufacturer guidelines.
  • Ensure proper grounding for the ECM.
  • Route and secure the wiring harness neatly.

Step-by-Step Installation of the LS Wiring Harness

The LS wiring harness installation involves connecting the ECM to engine sensors, integrating it with the vehicle’s electrical system, and ensuring all connections are secure and properly grounded.

Connecting the ECM to the Engine Sensors

Connecting the ECM to engine sensors is a critical step in the LS wiring harness installation. Start by identifying the sensor connectors, such as the crankshaft position sensor, camshaft position sensor, and oxygen sensors. Ensure all connectors are clean and free from corrosion. Use the wiring diagram to match each sensor to its corresponding ECM port. Securely plug in each connector, making sure they click into place. Double-check the wiring for any signs of damage or wear. Once all sensors are connected, power up the ECM and use a scan tool to verify communication with each sensor. If any issues arise, refer to the troubleshooting guide to resolve connection problems. Proper sensor connection ensures accurate engine performance and prevents potential faults. Always follow the manufacturer’s guidelines for ECM sensor connections to guarantee reliability and optimal engine operation.

Integrating the Wiring Harness with the Vehicle’s Electrical System

Integrating the LS wiring harness with your vehicle’s electrical system requires careful planning and precision. Start by identifying key connections, such as the battery, ground points, and fuse box. Use the wiring diagram to ensure proper connections to the vehicle’s existing electrical components. Connect the ECM to the vehicle’s computer and other control modules, such as the transmission control module (TCM) if applicable. Ensure all power and ground wires are securely attached to the correct terminals. For vehicles with additional features like air conditioning or power steering, integrate these systems into the harness. Double-check all connections to avoid short circuits or electrical interference. Once integrated, test the system by turning the ignition on and verifying that all components function correctly. Proper integration ensures seamless communication between the LS engine and the vehicle’s electrical systems, providing reliable performance and functionality.

Troubleshooting Common Issues with LS Wiring Harnesses

Common issues with LS wiring harnesses include faulty connections, wiring diagram misunderstandings, and ECM communication errors. Check connections for damage, use wiring diagrams to trace issues, and address ECM communication problems promptly.

Identifying and Repairing Faulty Connections

Identifying and repairing faulty connections is critical for ensuring proper functionality of your LS wiring harness. Start by visually inspecting all connectors and wires for signs of damage, corrosion, or wear. Use a wiring diagram to trace connections and verify that all components are securely plugged in. Common issues include loose connections, damaged pins, or improperly routed wires. For diagnosis, use a multimeter to test for continuity and voltage drops. If a connection is faulty, clean or replace the affected pins. In cases of severe damage, such as frayed wires, cut and solder new connectors, ensuring proper insulation. Always follow proper soldering techniques to avoid introducing new issues. Regularly inspect high-stress areas, such as near the engine or transmission, where movement can cause wear. By methodically addressing each connection, you can resolve faults and ensure reliable operation of your LS engine swap.

Resolving ECM Communication Errors

ECM communication errors can disrupt the operation of your LS engine, requiring prompt attention. Begin by checking the power and ground connections to the ECM, ensuring they are clean and free from corrosion. Verify that the battery voltage is stable and within the recommended range. If using a scan tool, review any stored trouble codes to pinpoint the source of the issue. Common causes include faulty connectors, open or shorted wires, or improper wiring harness installation. Inspect the communication lines, such as the CAN bus, for damage or interference. Consult your wiring diagram to confirm that all connections are correct. If issues persist, consider reprogramming the ECM or consulting a professional. Regular maintenance and thorough troubleshooting can help resolve ECM communication errors and restore optimal engine performance. Always follow proper diagnostic procedures to ensure accurate and effective repairs.

functional skills english level 2 writing samples answers pdf

Functional Skills English Level 2 is a qualification that focuses on practical communication skills‚ essential for everyday life and workplace scenarios. It covers reading‚ writing‚ speaking‚ and listening‚ ensuring learners can apply English effectively in real-life situations. This level is designed to build confidence and competence‚ preparing individuals for further education or career opportunities. The qualification is recognized nationally and is often required for progression in various fields.

1.1 Overview of Functional Skills English

Functional Skills English is a qualification designed to develop practical communication skills for everyday life and work. It covers reading‚ writing‚ speaking‚ and listening‚ focusing on real-life contexts. Available at various levels‚ it ensures learners can apply English effectively in personal and professional settings. This qualification is tailored to build essential skills‚ making it a foundation for further education or employment opportunities.

1.2 Importance of Level 2 in the Qualification Framework

Functional Skills English Level 2 is a pivotal qualification‚ bridging basic skills with advanced communication. It equips learners with the ability to handle complex texts‚ articulate ideas clearly‚ and apply English in professional settings. Recognized by employers and educational institutions‚ Level 2 enhances career prospects and serves as a stepping stone for higher-level qualifications‚ fostering personal and professional growth.

Structure of the Writing Component at Level 2

The writing component at Level 2 involves tasks like formal and informal letters‚ reports‚ and essays. Learners must complete 1-2 written responses‚ adhering to word counts and formatting guidelines.

2.1 Types of Writing Tasks Included

The writing tasks at Level 2 include formal and informal letters‚ reports‚ essays‚ and descriptive writing. These tasks assess the ability to communicate clearly and effectively for different purposes and audiences. Learners may write letters of complaint‚ job applications‚ or informal correspondence. Reports require structuring information logically‚ while essays test the ability to develop and support arguments. All tasks emphasize practical‚ real-life scenarios.

2.2 Word Count and Formatting Requirements

Writing tasks at Level 2 typically require 150-. Learners must adhere to clear formatting‚ such as using proper headings‚ paragraphs‚ and bullet points where appropriate. The focus is on clarity‚ conciseness‚ and presenting information in a structured manner. Correct use of spacing‚ margins‚ and font styles is also expected to ensure professionalism and readability in the final output.

Key Skills Assessed in Level 2 Writing

Functional Skills English Level 2 Writing assesses spelling‚ grammar‚ vocabulary‚ and clarity. It evaluates coherence‚ purpose‚ and audience awareness‚ ensuring effective communication through appropriate tone and style.

3.1 Spelling‚ Punctuation‚ and Grammar

Accuracy in spelling‚ punctuation‚ and grammar is crucial at Level 2. Learners must demonstrate control over sentence structure‚ correct use of commas‚ and proper spelling. Common errors‚ such as subject-verb agreement or misplaced apostrophes‚ can significantly impact clarity. Proper grammar ensures effective communication‚ while correct punctuation enhances readability. Regular practice with past papers and worksheets helps improve these skills.

3.2 Sentence Structure and Coherence

Effective sentence structure and coherence are vital for clear communication in Level 2 writing. Learners should use varied sentence lengths and structures to convey ideas logically. Proper use of conjunctions and linking words ensures smooth transitions between sentences. Clear and focused paragraphs help maintain the reader’s understanding. Practicing sentence construction and organizing ideas coherently are key to meeting the qualification standards.

3.3 Use of Vocabulary and Tone

The appropriate use of vocabulary and tone is essential in Level 2 writing. Learners should select words that accurately convey meaning and suit the context. Tone must align with the purpose‚ audience‚ and format of the writing. For example‚ formal letters require a professional tone‚ while informal writing may be more conversational. Practicing vocabulary expansion and understanding context clues enhances this skill‚ ensuring effective communication.

Marking Criteria for Level 2 Writing

Marking criteria assess clarity‚ structure‚ vocabulary‚ and grammar. Writing must demonstrate clear communication‚ logical organization‚ and appropriate language use to meet the required standards effectively.

4.1 How Marks Are Allocated

Marks are allocated based on spelling‚ punctuation‚ grammar‚ sentence structure‚ and vocabulary. Spelling and punctuation account for 20%‚ while sentence structure and coherence make up 30%. Vocabulary and tone contribute 50% of the total marks. Higher marks are awarded for consistent accuracy‚ clarity‚ and effective use of language to meet the task requirements.

4.2 Common Mistakes to Avoid

Common mistakes include poor spelling‚ punctuation errors‚ and grammar issues. Students often fail to address the question fully or structure their writing clearly. Overuse of simple sentences and informal language can reduce marks. Misunderstanding the task requirements is another frequent error. Ensuring thorough proofreading and planning before writing can help minimize these mistakes and achieve better results.

Sample Writing Questions and Answers

This section provides examples of writing tasks‚ such as formal and informal letters‚ reports‚ and essays. Each sample includes a question‚ model answer‚ and tips for improvement.

5.1 Formal Letter Writing Examples

Formal letters demonstrate clear structure and tone‚ suitable for professional or official purposes. Examples include job applications‚ complaints‚ or requests. Each letter should include your address‚ date‚ recipient’s details‚ salutation‚ purpose‚ and closing. Model answers show how to maintain formality while addressing the reader effectively. Practicing these examples helps learners master the layout and language required for formal communication.

5.2 Informal Letter Writing Examples

Informal letters are personal and conversational‚ often used to connect with friends or family. Examples include sharing news‚ planning events‚ or expressing opinions. Sample answers showcase how to maintain a casual tone while organizing thoughts effectively. These exercises help learners develop a natural writing style‚ focusing on clarity and personal expression in everyday communication.

5.3 Report Writing Examples

Report writing at Level 2 requires clear‚ factual‚ and structured content. Examples include writing about events‚ projects‚ or analyses. Sample answers demonstrate how to organize information logically‚ use appropriate language‚ and maintain objectivity. These exercises help learners develop analytical skills‚ ensuring their reports are informative‚ concise‚ and meet the intended purpose effectively.

Tips for Improving Writing Skills at Level 2

Practice regular writing exercises‚ focus on clarity and grammar‚ and review sample answers for structure. Use study guides and seek feedback to refine your techniques effectively.

6.1 Practicing Different Writing Styles

Mastering various writing styles enhances versatility. Practice formal letters‚ reports‚ and informal notes to build confidence. Analyze sample answers for tone‚ structure‚ and vocabulary. Regular exercises help adapt to different contexts‚ ensuring clarity and effectiveness in communication. This approach prepares learners for diverse writing tasks‚ improving overall English proficiency.

6.2 Using Online Resources and Worksheets

Online resources and worksheets are invaluable for improving writing skills. Utilize practice tests‚ interactive exercises‚ and downloadable guides to refine grammar‚ vocabulary‚ and structure. Websites offer sample answers‚ feedback tools‚ and progress trackers. Regular use helps identify weaknesses‚ builds confidence‚ and ensures readiness for assessments. These tools provide flexible learning opportunities‚ catering to individual needs and learning styles.

Common Challenges in Level 2 Writing

Common challenges include time management during exams and understanding question requirements. These issues often lead to incomplete or off-topic responses‚ affecting overall performance and accuracy.

7.1 Managing Time Effectively During the Exam

Managing time effectively during the exam is crucial for completing all tasks. Learners should allocate specific durations to reading‚ planning‚ and writing. Prioritize tasks to ensure all questions are attempted. Avoid spending too long on one question‚ as this can impact the ability to address others. Practice timed exercises to build confidence and efficiency.

  • Review the entire paper first to understand requirements.
  • Allocate time for planning and drafting answers.
  • Move to the next question if stuck after a minute or two.
  • Leave a few minutes for reviewing work before submission.

7.2 Understanding the Question Requirements

Understanding the question requirements is vital to producing relevant and effective answers. Learners must carefully read and interpret the task‚ identifying key words and instructions. This ensures responses align with what is being asked‚ avoiding unnecessary information. Practicing question analysis and breaking down complex questions can enhance this skill‚ leading to more focused and accurate writing.

  • Identify the task type (e.g.‚ letter‚ report‚ essay).
  • Highlight key words and instructions.
  • Plan the structure to address all points.

Resources for Preparation

Utilize study guides‚ workbooks‚ and online platforms for practice tests. Interactive tools and video tutorials can enhance learning. Accessing past papers and sample answers is highly beneficial.

  • Recommended workbooks for structured practice.
  • Online platforms offering mock exams.
  • Interactive tools for skill development.

8.1 Recommended Study Guides and Workbooks

Invest in reputable study guides and workbooks tailored for Functional Skills English Level 2. These resources provide structured practice exercises‚ model answers‚ and expert tips to improve writing skills. Popular options include workbooks from major educational publishers like Oxford University Press and Collins. They often include practice tests‚ progress trackers‚ and detailed feedback sections to help learners refine their abilities effectively.

  • Look for guides with sample questions and answers.
  • Choose workbooks offering clear explanations and examples.
  • Utilize resources with focus on exam-style tasks;

8.2 Online Platforms for Practice Tests

Online platforms like BBC Bitesize‚ Skillsworkshop‚ and City & Guilds offer practice tests and resources for Functional Skills English Level 2. These platforms provide mock exams‚ sample questions‚ and interactive exercises to help learners prepare effectively. They often include answer keys and feedback tools to track progress and identify areas for improvement. Utilizing these platforms can significantly enhance exam readiness and confidence.

  • Access practice tests tailored to exam standards.
  • Benefit from immediate feedback and scoring.
  • Engage with interactive exercises for better retention.

The Role of Feedback in Improvement

Feedback is essential for identifying strengths and areas needing improvement‚ guiding learners to refine their writing skills. Constructive feedback provides specific advice‚ enabling learners to understand and correct mistakes‚ leading to enhanced performance over time.

  • Clarifies weaknesses and areas for development.
  • Offers actionable insights for improvement.
  • Builds confidence and promotes progress.

9.1 How to Use Feedback to Enhance Writing Skills

Feedback is a powerful tool for improving writing skills. Analyze the comments provided‚ identifying specific strengths and weaknesses. Use this information to address errors‚ refine sentence structure‚ and expand vocabulary. Implementing feedback effectively involves practicing targeted areas‚ seeking additional resources‚ and reflecting on progress over time to achieve continuous improvement.

  • Analyze feedback to understand areas needing attention.
  • Practice revising work based on specific suggestions.
  • Use resources to address identified weaknesses.

9.2 Self-Assessment Techniques

Self-assessment involves evaluating your own writing to identify strengths and areas for improvement. Start by reviewing your work against the marking criteria‚ focusing on clarity‚ grammar‚ and coherence. Use checklists or rubrics to guide your evaluation. Set specific‚ achievable goals based on your findings and track your progress over time to refine your skills effectively.

  • Review your work against the marking criteria.
  • Identify specific areas needing improvement.
  • Set and track progress toward achievable goals.

Success Stories and Case Studies

Learners achieving distinction in Functional Skills English Level 2 often share strategies like consistent practice and focused revision. Their success highlights the effectiveness of tailored study approaches and dedication to improving writing skills‚ inspiring others to pursue similar goals with confidence and determination.

10.1 Learners Who Achieved Distinction in Level 2 Writing

Many learners who achieved distinction in Level 2 Writing demonstrated exceptional command over grammar‚ spelling‚ and sentence structure. They consistently practiced with sample questions‚ utilized online resources‚ and sought feedback to refine their skills. Their success stories highlight the importance of dedication‚ effective study habits‚ and understanding the marking criteria to excel in the exam.

10.2 Strategies Used by Successful Candidates

Successful candidates employed structured approaches‚ such as creating detailed plans and using PEEL (Point‚ Evidence‚ Explain‚ Link) for coherent paragraphs. They practiced under timed conditions‚ reviewed sample answers‚ and focused on clarity and relevance. Regular self-assessment and seeking feedback were key strategies‚ ensuring their writing met the highest standards and aligned with the exam criteria effectively.

The Importance of Practice

Regular practice is crucial for improving writing skills‚ building confidence‚ and familiarizing oneself with exam formats. It helps identify weaknesses and refine techniques‚ ensuring better performance.

11.1 Regular Writing Exercises

Engaging in regular writing exercises helps develop fluency and accuracy. By completing tasks like essays‚ letters‚ and reports‚ learners can enhance their vocabulary‚ grammar‚ and sentence structure. Consistent practice also improves time management and reduces exam anxiety‚ ensuring they can articulate ideas clearly and coherently. This habit fosters confidence and prepares them for real-life communication challenges effectively.

11.2 Simulating Exam Conditions

Simulating exam conditions helps learners prepare for the actual test environment. By practicing under timed conditions and using past papers‚ learners can improve their time management and reduce exam anxiety. This approach familiarizes them with the exam format‚ enabling them to focus on demonstrating their skills effectively. Regular simulation builds confidence and ensures they are well-prepared for the assessment.

Final Tips for Exam Day

Stay calm and focused on exam day.
Arrive early‚ read instructions‚
manage your time‚
and review work before submission
for clarity and accuracy.
Present neatly.

12.1 Staying Calm and Focused

To stay calm and focused‚ practice deep breathing exercises before the exam.
Avoid cramming and ensure a good night’s sleep.
Use positive affirmations to boost confidence.
Skim through questions first to plan your approach.
Break tasks into smaller steps to maintain concentration.
Stay hydrated and energized with light snacks.
Remember‚ preparation is key to managing exam stress effectively.

12.2 Reviewing Work Before Submission

Always review your writing before submitting to catch spelling and grammar errors.
Ensure your response addresses all parts of the question.
Check for clarity and coherence in your arguments;
Make sure your work meets the word count and formatting requirements.
Taking a moment to review can significantly improve the quality of your submission and help you achieve a better grade.

Achieving Functional Skills English Level 2 is a significant milestone‚ equipping you with essential communication skills for real-life scenarios. Use this foundation to progress to higher levels or pursue further education and career opportunities. Accessing resources like writing samples and answer guides can support your continued development and confidence in English.

13.1 Progressing to Higher Levels

Completing Functional Skills English Level 2 opens doors to advanced qualifications‚ such as GCSEs or vocational courses. Learners can transition seamlessly‚ applying their improved skills in reading‚ writing‚ and communication. Utilizing resources like writing samples and answer guides helps bridge gaps and builds confidence for higher-level challenges. Regular practice and feedback are key to continued growth and success in more demanding academic or professional environments.

13.2 Applying Skills in Real-Life Scenarios

Functional Skills English Level 2 equips learners with practical abilities to handle real-life situations confidently. Skills like drafting emails‚ understanding workplace documents‚ and composing formal letters are invaluable in professional settings. These competencies also enhance daily tasks‚ such as filling out forms or communicating effectively with service providers. Real-world application ensures learners can navigate various scenarios with clarity and precision‚ making the qualification both relevant and impactful.

answer key networks guided reading activity answers lesson 1

This guided reading activity introduces students to answer key networks, enhancing comprehension skills through structured vocabulary and cause-effect analysis. It aligns with CEFR Level A2 for Schools, focusing on pre-teaching vocabulary and scaffolding instruction for ELL students to improve language learning outcomes.

1.1 Overview of the Activity

This activity introduces students to guided reading strategies, focusing on answer key networks to enhance comprehension. It includes pre-teaching vocabulary, cause-effect analysis, and structured questioning. Aligned with CEFR Level A2 for Schools, the lesson uses answer keys and multiple-choice questions to assess understanding. The activity supports ELL students with scaffolding techniques, promoting active participation and reflection to build a strong foundation in language skills.

1.2 Importance of Guided Reading in Language Learning

Guided reading is essential for developing language skills, fostering vocabulary acquisition, and improving comprehension. It supports ELL students by breaking tasks into manageable parts, encouraging active participation, and promoting reflection. This structured approach builds confidence and a strong foundation in literacy, aligning with CEFR Level A2 for Schools and enhancing overall language proficiency through engaging and meaningful interactions.

Understanding the Structure of Lesson 1

Lesson 1 is structured to include pre-taught vocabulary, cause-effect analysis, and multiple-choice questions. It aligns with CEFR Level A2, focusing on clear objectives and interactive activities to engage students.

2.1 Key Components of the Lesson Plan

The lesson plan includes pre-taught vocabulary, cause-effect analysis, and multiple-choice questions. It incorporates answer key worksheets for feedback and features clear objectives aligned with CEFR Level A2. Activities are designed to engage students through interactive discussions and scaffolded instruction, ensuring a balanced approach to reading comprehension and language development.

2.2 Aligning with CEFR Level A2 for Schools

This lesson plan aligns with CEFR Level A2 for Schools, focusing on basic language skills and reading comprehension. Activities are tailored to A2-level vocabulary and grammar, ensuring students can identify main ideas and supporting details. The use of answer keys and scaffolding instruction supports learners in developing foundational English proficiency, preparing them for further language acquisition and academic success.

Cause-and-Effect Analysis in Reading Comprehension

Identifying cause-and-effect relationships in texts enhances comprehension by understanding how events influence outcomes. This strategy helps students analyze relationships, making reading more meaningful and interactive for learners.

3.1 Identifying Causes and Effects in Text

Identifying causes and effects in text involves analyzing relationships between events and their outcomes. Students learn to recognize causal language, such as “so” or “because,” and understand how actions lead to results. For example, in Exercise 6 on page 33, students determine why certain events occurred, enhancing their ability to interpret and connect ideas logically. This skill is supported by pre-teaching vocabulary and scaffolding instruction for ELL students to ensure comprehension and engagement.

3.2 Applying Cause-and-Effect Strategies to Lesson 1

Applying cause-and-effect strategies involves guiding students to identify and explain relationships between events and outcomes in the text. Teachers use pre-taught vocabulary and guiding questions to help students analyze causal links, such as in Exercise 6 on page 33. This approach enhances comprehension and critical thinking, ensuring students can logically connect ideas and support their answers with evidence from the text.

Effective Questioning Techniques for Comprehension

Effective questioning involves using “Right There,” “Think and Search,” and “On Your Own” questions to guide students in analyzing texts, promoting deeper understanding and critical thinking skills.

4.1 Level 1: “Right There” Questions

Level 1 questions, or “Right There” questions, are explicitly stated in the text, requiring students to locate and extract information directly from the passage. These questions are designed to assess basic comprehension and ensure students can identify key details accurately. They are particularly useful for ELL students and younger learners, as they build confidence and foundational reading skills.

Teachers use these questions to guide students in understanding the literal meaning of the text, ensuring they can pinpoint answers without inference. This approach aligns with CEFR Level A2 for Schools, focusing on clear and straightforward language to support language development and reading proficiency.

4.2 Level 2: “Think and Search” Questions

Level 2 questions, or “Think and Search” questions, require students to delve deeper into the text, making connections and inferring information not explicitly stated. These questions encourage critical thinking and the ability to synthesize details from various parts of the passage. They are ideal for developing intermediate comprehension skills, particularly for ELL students, as they promote active engagement with the material. Teachers use these questions to assess students’ ability to interpret and analyze the text, fostering higher-order thinking and preparing them for more complex reading tasks.

By aligning with CEFR Level A2 for Schools, these questions help students build confidence in their reading abilities while introducing them to more challenging comprehension strategies. This level of questioning is essential for scaffolding instruction and ensuring students can move beyond literal understanding to more abstract interpretations of the text.

4.3 Level 3: “On Your Own” Questions

Level 3, or “On Your Own” questions, require students to think abstractly, connecting the text to their own experiences, opinions, or prior knowledge. These questions push students beyond the text, fostering creative and critical thinking. They are designed to assess a student’s ability to make personal connections and think independently, preparing them for real-life discussions and advanced reading tasks.

By encouraging students to express their thoughts and opinions, these questions help build confidence and fluency in language use. They align with CEFR Level A2 for Schools, supporting students in developing higher-order thinking skills and applying what they’ve learned to new contexts.

Utilizing Answer Keys for Feedback and Improvement

Answer keys provide immediate feedback, helping students identify strengths and areas for improvement. They support self-correction and reflection, enhancing reading comprehension and language skills effectively.

5.1 Interpreting Answer Key Worksheets

Answer key worksheets provide clear solutions to reading exercises, enabling students to verify their responses. They highlight correct answers and explain reasoning, aiding self-correction. Teachers use these keys to identify common errors and tailor feedback, ensuring targeted improvement. Worksheets often include multiple-choice answers and “right there” questions, helping students understand their mistakes and track progress effectively in guided reading activities.

5.2 Strategies for Reviewing Correct and Incorrect Answers

Reviewing answers involves analyzing correct responses to reinforce understanding and identifying errors to address gaps. Teachers provide timely feedback, explaining why answers are right or wrong. Encouraging self-correction and reflection helps students learn from mistakes. This process promotes improved reading comprehension and accuracy, ensuring learners grasp key concepts effectively in guided reading activities.

Scaffolding Instruction for ELL Students

Scaffolding instruction provides temporary support to ELL students, helping them build on prior knowledge. Techniques include pre-teaching vocabulary and using visual aids to enhance comprehension and engagement.

6;1 Pre-teaching Vocabulary for Better Comprehension

Pre-teaching vocabulary involves introducing key words before reading to enhance comprehension. This strategy supports ELL students by clarifying meanings, providing examples, and using visual aids, making abstract concepts more accessible. By familiarizing students with new terms, it reduces confusion and boosts confidence, fostering active participation in guided reading activities.

6.2 Encouraging Student Participation and Reflection

Encouraging participation involves creating a supportive environment where students feel comfortable sharing ideas. Teachers can use think-pair-share, group discussions, and reflective prompts to foster engagement. Positive reinforcement and feedback loops help students build confidence. Reflective practices, such as journaling or class discussions, deepen understanding and promote critical thinking, ensuring students take ownership of their learning process.

The Role of the Teacher in Guided Reading

Teachers guide students through reading activities, facilitate discussions, and use cause-effect strategies to deepen comprehension. They provide timely feedback, encourage critical thinking, and ensure understanding of the material.

7.1 Facilitating Discussions and Encouraging Critical Thinking

Teachers create an interactive environment where students engage in reflective discussions, fostering critical thinking. They pose open-ended questions to explore ideas, linking discussions to the text. By encouraging students to share insights and question assumptions, teachers help develop deeper comprehension and analytical skills, ensuring active participation and meaningful understanding of the material.

7.2 Providing Timely Feedback and Guidance

Teachers provide timely feedback during guided reading, clarifying doubts and correcting misunderstandings. They use answer keys to identify common errors and offer personalized guidance, ensuring students understand concepts. This approach promotes reflection and confidence, enabling learners to improve their language skills and critical thinking abilities effectively.

Assessing Student Progress and Understanding

Assessment tools, such as multiple-choice questions and answer keys, evaluate students’ comprehension and language skills. These methods identify strengths, areas for improvement, and guide future instruction effectively.

8.1 Using Multiple-Choice Questions Effectively

Multiple-choice questions are a valuable tool for assessing student understanding in guided reading activities. They align with CEFR Level A2 for Schools, targeting specific skills like vocabulary recognition and comprehension. Clear instructions ensure students focus on the task, while answer keys provide immediate feedback. This method helps identify areas needing review and reinforces learning by encouraging critical thinking and reducing guesswork.

8.2 Evaluating Student Responses for Accuracy

Evaluating student responses involves comparing answers to the answer key, ensuring accuracy and understanding. Teachers review correct and incorrect answers, providing clear feedback. This process helps identify common errors and areas needing review. By aligning responses with CEFR Level A2 for Schools, educators can assess comprehension and track progress, ensuring scaffolding instruction meets student needs effectively.

Integrating Technology and AI Tools for Enhanced Learning

Technology and AI tools enhance learning by offering personalized experiences, improving efficiency, and supporting tailored instruction. These resources enable effective lesson planning and resource management, benefiting both teachers and students.

9.1 Leveraging AI for Personalized Learning Experiences

AI tools enable personalized learning by offering tailored resources and adaptive assessments. They analyze student progress, providing real-time feedback and customized exercises. This approach supports diverse learning needs, allowing teachers to address individual challenges effectively while fostering engagement and improving outcomes for all students.

9.2 Enhancing Efficiency in Lesson Planning and Delivery

AI tools streamline lesson planning by automating repetitive tasks, optimizing resource allocation, and providing real-time feedback. They analyze student data to offer insights, enabling teachers to refine strategies. Additionally, AI assists in creating engaging content and assessments, ensuring a more efficient and effective learning experience while allowing educators to focus on teaching and student support.

Leveraging AI and guided reading strategies enhances learning efficiency, aligns with CEFR A2 standards, and paves the way for innovative future applications in educational settings.

10.1 Summarizing Key Takeaways from Lesson 1

Lesson 1 emphasizes structured vocabulary, cause-effect analysis, and scaffolding techniques for ELL students. It highlights the importance of pre-teaching vocabulary and using answer keys for timely feedback. Aligning with CEFR A2, the activity focuses on improving comprehension and critical thinking through guided reading. These strategies foster a strong foundation in language skills and encourage active participation, preparing students for future reading challenges.

10.2 Applying Strategies to Future Reading Activities

Applying Lesson 1 strategies to future reading activities involves reinforcing cause-effect analysis, leveraging pre-taught vocabulary, and integrating technology for personalized learning. Encouraging student reflection and participation fosters critical thinking and language mastery. These approaches, aligned with CEFR A2, create a strong foundation for future lessons, ensuring students develop lifelong literacy skills and confidence in reading comprehension and vocabulary use.

Additional Resources for Further Development

Additional resources include recommended reading materials and online tools to reinforce reading skills and vocabulary practice, supporting further development in guided reading activities effectively.

11.1 Recommended Reading Materials and Worksheets

Recommended reading materials include graded readers, practice workbooks, and online worksheets tailored for A2 level students. These resources focus on vocabulary building, comprehension exercises, and cause-effect analysis. Additional worksheets provide targeted practice for identifying causes and effects, aligning with lesson objectives. Online platforms offer interactive activities to reinforce learning, ensuring students can practice at their own pace and review concepts effectively for better understanding and retention of the material.

11.2 Online Tools for Practicing Reading Skills

Utilize online platforms like Khan Academy, Duolingo, and Read Theory for interactive reading exercises. These tools offer AI-driven activities, multiple-choice questions, and cause-effect analysis tasks. They provide real-time feedback, personalized learning paths, and progress tracking. Such resources support the development of reading comprehension and vocabulary, aligning with the lesson’s objectives and enhancing students’ ability to achieve proficiency and confidence in their language skills effectively.

Final Thoughts on the Importance of Guided Reading

Guided reading fosters a strong foundation in language skills, encouraging lifelong literacy and critical thinking. It supports scaffolding instruction, vocabulary development, and comprehension strategies, ensuring students achieve proficiency and confidence.

12.1 Building a Strong Foundation in Language Skills

Guided reading activities, like those in Lesson 1, provide learners with essential tools to decode, comprehend, and apply language effectively. By focusing on vocabulary, cause-effect relationships, and structured questioning, students build fluency and confidence. These skills align with CEFR Level A2 for Schools, ensuring a solid base for future language development and fostering lifelong literacy and communication abilities.

12.2 Encouraging Lifelong Learning and Literacy

Guided reading activities foster a love for reading and learning, equipping students with skills to engage critically with texts. By emphasizing vocabulary, comprehension, and reflection, these lessons promote literacy and a growth mindset. Aligning with CEFR Level A2 for Schools, they empower learners to embrace language learning as a lifelong journey, building confidence and a deeper appreciation for reading.

References and Acknowledgments

Key sources include educational journals, Cambridge A2 Key for Schools materials, and online tools for reading skills development.

Acknowledgments extend to educators and contributors who supported the creation and refinement of this guided reading activity.

13.1 Citing Key Sources and Materials

Key sources include educational journals, Cambridge A2 Key for Schools materials, and online tools for reading skills development. These materials align with CEFR Level A2, focusing on word recognition and language comprehension. They provide structured lesson plans, vocabulary exercises, and reading strategies, supporting effective teaching methodologies and student progress tracking.

13.2 Recognizing Contributors to the Activity

Contributors to this activity include educators, curriculum developers, and educational institutions that provided resources and support. Their efforts in developing materials, sharing strategies, and providing feedback have been instrumental in enhancing the guided reading experience. Special thanks to technology partners for tools that aid in lesson planning and delivery, ensuring effective teaching and learning outcomes.

quando m’en vo pdf

“Quando Men Vo,” from Puccini’s La Bohème, is a captivating aria showcasing Musetta’s charm. Its lush melody and emotional depth make it a beloved piece, widely sought as a PDF for performances and study.

1.1 Background and Context

Quando Men Vo, or “Musetta’s Waltz,” is a iconic aria from Giacomo Puccini’s opera La Bohème, premiered in 1896. It is sung by the character Musetta in Act II, showcasing her vivacity and charm. The aria’s lush melody and waltz-like rhythm capture the essence of 19th-century Parisian life. Composed with rich orchestration, it highlights Puccini’s mastery of emotional depth and musical storytelling. The piece has become a favorite among sopranos and audiences alike, often performed in concerts and recitals. Its enduring popularity underscores its significance in the operatic repertoire.

Composition and Structure

Quando Men Vo is a waltz aria in 3/4 time, with a tempo di valzer lento. Its composition features a soaring melody for soprano, accompanied by piano or orchestra, blending lyrical elegance with dramatic intensity.

2.1 Musical Structure and Orchestration

The aria Quando Men Vo is structured as a waltz in 3/4 time, marked Tempo di Valzer Lento. It features a lilting melody with rubato passages, showcasing the soprano’s vocal agility and expressiveness. The orchestration is lush, with a full orchestra including harp, strings, woodwinds, and light percussion. A piano reduction is commonly used for voice and piano arrangements, maintaining the piece’s emotional depth. The waltz-like rhythm underscores Musetta’s flirtatious nature, while the orchestral textures enhance the aria’s dramatic and romantic qualities, making it a standout piece in Puccini’s repertoire.

Sources for “Quando Men Vo PDF”

The PDF of Quando Men Vo is widely available on sheet music platforms, offering arrangements for piano, voice, and various instruments. High-quality, interactive versions enable easy transposition and practice.

3.1 Available Arrangements and Instruments

Quando Men Vo is available in various arrangements, catering to different skill levels and preferences. Piano and voice versions are most common, but transcriptions for flute, guitar, and even full orchestra exist. Some platforms offer interactive scores, allowing transposition to any key. Arrangements for soprano and piano, such as those by Jwagner, are particularly popular. Additionally, MIDI files and piano solos provide versatility for practice and performance. Many versions are free to download, making this piece accessible to musicians worldwide. These arrangements ensure Quando Men Vo remains a timeless favorite for both professionals and enthusiasts.

How to Download the PDF

To download the Quando Men Vo PDF, visit platforms like sheetmusicplus.com or musicnotes.com. Search for the piece, select your preferred arrangement, and follow the checkout process. Many versions are free or available for purchase, ensuring easy access to this iconic aria.

4.1 Platforms and Accessibility

Multiple platforms offer Quando Men Vo PDF for easy download. Websites like Musicnotes and Sheet Music Plus provide instant access to arrangements for piano, voice, and various instruments. Some versions are free, while others require purchase. Platforms like MuseScore and PDFMiner also host this piece, ensuring accessibility for musicians worldwide. These sites cater to both professionals and amateurs, offering high-quality sheet music for practice, performance, or study. Accessibility is enhanced with features like transpose and print options, making it simple for users to customize and download the PDF according to their needs.

Popularity and Usage

“Quando Men Vo” remains a timeless piece, widely performed and adapted. Its popularity endures in concerts, recitals, and educational settings, appealing to both professionals and music enthusiasts globally.

5.1 Performances and Adaptations

“Quando Men Vo” is widely performed in operas, concerts, and recitals, showcasing its timeless appeal. It has been arranged for various instruments, including piano, guitar, and flute, making it accessible to diverse musicians. The piece is frequently featured in classical music playlists and educational materials, highlighting its educational value. Many adaptations, such as JWagner’s arrangement for piano and soprano, demonstrate its versatility. Its availability in PDF format on platforms like MuseScore and Musicnotes has further popularized it among students and professionals, ensuring its continued relevance in modern classical music repertoire.

Cultural and Historical Impact

“Quando Men Vo” is a celebrated aria from Puccini’s La Bohème, reflecting the composer’s mastery of emotional expression. Its availability in PDF has ensured its legacy, inspiring countless performances and adaptations, making it a cornerstone of classical music heritage.

6.1 Influence on Media and Modern-Day Relevance

“Quando Men Vo” has transcended opera, influencing films, commercials, and modern covers. Its timeless appeal lies in its emotional depth and melodic beauty. Available as a PDF, it remains accessible for contemporary musicians and enthusiasts, ensuring its relevance in today’s musical landscape.

Interpretation and Performance Challenges

Performing “Quando Men Vo” demands exceptional vocal technique, precise emotional expression, and nuanced interpretive skills. The PDF scores highlight these challenges clearly for musicians.

7.1 Vocal and Instrumental Considerations

The vocal demands of “Quando Men Vo” require a soprano with agility and expressive range, while the instrumental accompaniment must balance subtlety and drama. The PDF scores reveal intricate dynamics, emphasizing the need for precise tempo control and nuanced phrasing. Musicians must master Puccini’s signature chromaticism and lyrical shifts, ensuring seamless transitions between sections. The piano reduction in many arrangements demands sensitivity to replicate the orchestral texture, while the soprano must convey Musetta’s vivacity and emotional depth. These challenges make the piece a rewarding yet demanding choice for performers seeking to interpret Puccini’s masterpiece authentically.

Place in Puccini’s Oeuvre

“Quando Men Vo” stands as a jewel in Puccini’s operatic legacy, showcasing his mastery of emotional depth and melodic brilliance in La Bohème, a cornerstone of his repertoire.

8.1 Comparison with Other Works

“Quando Men Vo” is often compared to Puccini’s other iconic arias, such as “O mio babbino caro” from Gianni Schicchi and “Vissi d’arte” from Tosca. While these pieces share Puccini’s signature emotional depth, “Quando Men Vo” stands out for its lighthearted, waltz-like melody, reflecting Musetta’s playful yet passionate nature. Unlike the dramatic intensity of “Vissi d’arte,” this aria offers a blend of elegance and charm, making it a unique gem in Puccini’s repertoire. Its accessibility and melodic beauty have cemented its popularity, often performed as a standalone piece by sopranos worldwide.

“Quando Men Vo” remains a timeless piece, celebrated for its beauty and emotional depth. Its availability in PDF ensures accessibility for musicians, solidifying its enduring appeal and relevance.

9.1 Final Thoughts and Recommendations

“Quando Men Vo” is a timeless aria that continues to captivate audiences with its elegance and emotional depth. For musicians seeking to perform or study this piece, downloading the PDF is highly recommended. It is widely available across various platforms, offering arrangements for piano, voice, and other instruments. Whether you are a professional or a student, this piece provides a rich musical experience. Its accessibility in digital formats ensures that it remains a cherished part of musical repertoire. Embrace the opportunity to explore and perform this iconic work, a true gem of operatic literature.

Posted in PDF