Welcome to the world of sock loom knitting! This versatile craft offers a simple‚ efficient way to create custom-fit socks for all skill levels. Perfect for beginners‚ loom knitting eliminates the need for complicated needles‚ making it easy to craft cozy‚ personalized footwear. With step-by-step guides‚ video tutorials‚ and free patterns‚ you’ll be knitting like a pro in no time. Say goodbye to pinched toes and floppy heels—loom knitting ensures a comfortable‚ tailored fit every time!
Overview of Sock Looms and Their Benefits
Sock looms are versatile tools designed for knitters of all skill levels‚ offering a unique way to craft custom-fit socks. They simplify the knitting process by eliminating the need for double-pointed needles‚ making it easier to work in the round. Adjustable looms allow for flexibility in stitch count‚ catering to various foot sizes and yarn weights. Their compact design and portability make them ideal for on-the-go projects. Additionally‚ sock looms reduce the complexity of traditional knitting‚ saving time while ensuring a professional finish. They are perfect for creating cozy‚ tailored footwear with minimal effort and maximum comfort.
Materials and Tools Needed for Sock Loom Knitting
To start‚ you’ll need a sock loom‚ yarn‚ a loom pick‚ a yarn needle‚ measuring tape‚ scissors‚ and stitch markers. These essentials ensure a smooth‚ enjoyable knitting experience.
Essential Supplies for Getting Started
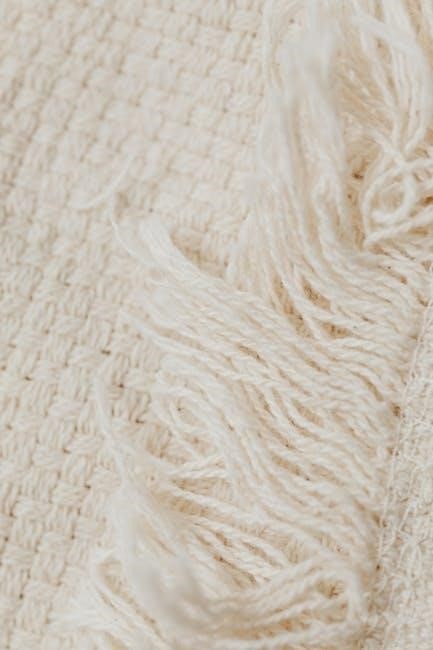
Begin your sock loom knitting journey with a few key supplies. A sock loom is the primary tool‚ available in round‚ oval‚ or square designs. Choose a yarn that suits your preference for softness‚ durability‚ and seasonality; A loom pick or knitting tool is necessary for creating stitches. Additionally‚ you’ll need a yarn needle for weaving ends‚ measuring tape for sizing‚ scissors‚ and stitch markers to track progress. A reusable storage bag keeps your project organized. These basic supplies ensure a smooth‚ enjoyable knitting experience from start to finish.

Step-by-Step Guide to Knitting Socks on a Loom
Master sock loom knitting with a clear‚ organized approach. Start by casting on‚ then knit rows to form the fabric. Shape the heel and toe for a custom fit‚ and finish neatly with a secure bind-off. Each step is designed to guide you smoothly from start to finish‚ ensuring a professional result.
Casting On: Setting Up Your Project
Casting on is the first step in sock loom knitting‚ setting the foundation for your project. Begin by creating a slipknot on your yarn‚ then loop it around the first peg of your loom. Gently pull the yarn to secure it‚ ensuring it’s not too tight. Continue casting on the desired number of stitches‚ moving evenly around the loom. Use a consistent tension to avoid gaps or puckering. Once all stitches are cast on‚ double-check the count to match your pattern. This step ensures a smooth start and a professional finish for your socks.
Knitting the Stitches: Creating the Fabric
With your stitches cast on‚ begin knitting by wrapping the yarn around each peg in a consistent manner. Use the e-wrap or true knit method‚ ensuring even tension to avoid loose or tight stitches. Knit row by row‚ moving around the loom until your fabric reaches the desired length. Maintain steady tension to create a smooth‚ even texture. For a snug fit‚ keep the yarn taut but not overly tight. This step forms the body of your sock‚ laying the groundwork for a comfortable and durable design.
Understanding Different Types of Sock Looms
Explore various sock loom types‚ including round‚ oval‚ and square designs. Each offers unique flexibility for knitting socks‚ with adjustable models allowing for custom stitch counts and sizes.
Choosing the Right Loom for Your Needs
Selecting the perfect sock loom depends on your project goals. Consider adjustable looms for flexibility‚ while fixed looms suit specific sizes. Round looms are ideal for seamless knitting‚ while square or oval looms offer better stitch control. For beginners‚ a small‚ round loom is recommended. Always match the loom size to your yarn weight and desired sock size. Adjustable looms are versatile‚ accommodating varying stitch counts for custom fits. Ensure your loom aligns with your skill level and project requirements for the best results.
Measuring for a Custom Fit
Accurate foot and ankle measurements ensure a perfect fit. Measure foot length and circumference‚ then adjust the loom size for a comfortable‚ tailored sock.
How to Ensure Your Socks Fit Perfectly
To achieve a perfect fit‚ start by taking accurate measurements of your foot length and circumference. Use these measurements to adjust the loom size and stitch count. Choose a yarn that matches your desired thickness and elasticity. Swatch the yarn to gauge its stretchiness and drape. Consider the heel and toe shape‚ ensuring they align with your foot’s natural curves. Try the sock on as you knit to make adjustments. Proper tension and even stitching are key to avoiding gaps or tight spots. A well-fitted sock ensures comfort and durability.

Constructing the Heel and Toe
Mastering the heel and toe is crucial for a comfortable fit. Use the short row method to shape the heel and toe seamlessly. Adjust stitches carefully to ensure smooth transitions and a snug‚ even fit.
Techniques for a Comfortable Fit
Achieve ultimate comfort by mastering key techniques. Use the short row method for a seamless heel and toe‚ ensuring a smooth transition. Adjust the number of pegs on your loom to accommodate foot shape and size. Properly measure your foot length and ankle circumference to customize the fit. Swatch before starting to ensure correct tension‚ as loose stitches can lead to baggy socks and tight stitches cause discomfort. Choose yarn with stretch for durability and comfort. These methods guarantee a perfect‚ tailored fit for any foot shape or size‚ making your handmade socks truly special.
Binding Off Your Sock
Binding off is the final step to secure your sock. Use a yarn needle to weave the last row of stitches neatly. Ensure even tension to maintain comfort and shape. Proper binding off prevents loose ends‚ completing your project cleanly. This step ensures durability and a professional finish for your handmade sock.
Finishing Your Project Neatly
Finishing your sock project neatly is essential for a professional look. After binding off‚ weave in yarn ends using a tapestry needle to ensure a clean appearance. If your pattern includes seams‚ sew them carefully with a yarn needle. For added polish‚ block your sock by wetting it‚ stretching it to shape‚ and allowing it to dry. This step ensures even stitching and a comfortable fit. Proper finishing techniques make your handmade sock durable and visually appealing‚ completing your project with pride.
Tips for Making Perfect Socks
- Choose the right yarn for comfort and durability.
- Select the correct loom size for your project.
- Measure your feet and ankles for a custom fit.
- Keep tension even to avoid tight spots.
- Use a stretchy bind-off method for comfort.
- Weave in ends neatly for a polished finish.
- Block your socks after completion for shape retention.
Expert Advice for Avoiding Common Mistakes
New to sock loom knitting? Avoid common pitfalls by following expert tips. First‚ ensure even tension while knitting to prevent loose or tight fabric. Second‚ measure your feet accurately to achieve the perfect fit. Third‚ use the correct yarn weight and needles to match your pattern. Fourth‚ avoid over-stretching the yarn while knitting‚ as it can lead to misshapen socks. Lastly‚ always count your stitches after each row to catch errors early. By following these tips‚ you’ll create professional-looking socks with ease and confidence!
Video Tutorials and Resources
Enhance your sock loom knitting skills with video tutorials from experts like KB Looms and The Crochet Crowd. Find step-by-step guides on YouTube and KnittingBoard.com for techniques like casting on‚ heel shaping‚ and binding off. These resources also offer free patterns and tips to help you master loom knitting effortlessly.
Additional Learning Aids
Enhance your sock loom knitting journey with video tutorials from YouTube and KnittingBoard.com‚ offering detailed guides for various techniques. Many sock looms‚ like the KB model‚ include instructional DVDs and booklets. These resources provide step-by-step instructions for casting on‚ knitting stitches‚ and shaping heels and toes. Online communities also share valuable tips and tricks‚ ensuring you can craft custom-fit socks with confidence and precision.
Free Patterns and Designs
Discover a variety of free patterns for sock loom knitting online‚ including striped‚ textured‚ and custom-fit designs. Websites like KnittingBoard.com and WambuiMadeIt offer step-by-step guides and tutorials to help you create unique socks with ease. These patterns cater to all skill levels‚ ensuring you can craft beautiful‚ functional footwear without cost. Explore diverse designs to suit your style and yarn preferences‚ making every pair truly personalized and special.
Exploring Various Sock Patterns
From simple to intricate‚ sock loom patterns offer endless creativity. Start with basic stripes or textured designs‚ then explore complex cables or Fair Isle motifs. Websites like KnittingBoard.com and Wambui Made It provide free tutorials for custom-fit socks‚ ensuring a perfect fit. You can also find patterns for themed socks‚ such as holiday-themed or sports-themed designs. Whether you prefer bulky yarn for winter or lightweight yarn for summer‚ there’s a pattern to match your style. These resources make it easy to experiment and create unique‚ personalized footwear for any occasion.

Troubleshooting Common Issues
Common issues like loose stitches or misaligned rows can be resolved by adjusting tension or restarting rows. Ensure proper yarn handling and loom alignment for best results.
Solving Problems While Knitting Socks
When encountering issues while knitting socks on a loom‚ start by identifying the root cause. Loose stitches often result from uneven tension—try tightening your yarn gently. Misaligned rows can be corrected by re-counting pegs and ensuring consistent stitch placement. If the heel or toe seems misshapen‚ review your short-row technique and ensure proper wrapping of stitches. For dropped stitches‚ carefully pick them up with a yarn needle without pulling too tightly. Regularly measuring your work against your foot ensures a proper fit. Adjustments can be made by altering the number of pegs or yarn weight. Patience is key—practice makes perfect!